
- 분류 전체보기 (575)

- PROGRAMMING (401)
- JAVA (11)
- JAVA SPRING (13)
- PYTHON (0)
- JAVASCRIPT (21)
- React (70)
- HTML (0)
- Next.JS (1)
- CSS (2)
- DB (Oracle, MongoDB, etc.) (1)
- 깃허브 (30)
- 백엔드 (2)
- 프로젝트 (23)
- 슈퍼코딩 강의 정리 (114)
- ERROR (5)
- 단축키 기타 (1)
- 리눅스 (2)
- LEETCODE (1)
- 정보처리기사 (1)
- 프로그래밍 영어 (2)
- 코테 (5)
- 면접준비 (33)
- 웹사이트 아이디어 비공개 (1)
- 정보처리기사(기본 CS 정보정리) (0)
- 백준 (1)
- 기타 (53)
- 도서 내용 정리 (5)
- 삽질로그 (2)
- PREPLY (1)
- TRAVEL (0)
- DIARY (2)
- OVERSEAS SALES (116)
- PERSONAL (1)
- PROGRAMMING (401)
| 일 | 월 | 화 | 수 | 목 | 금 | 토 |
|---|---|---|---|---|---|---|
| 1 | 2 | 3 | 4 | 5 | 6 | |
| 7 | 8 | 9 | 10 | 11 | 12 | 13 |
| 14 | 15 | 16 | 17 | 18 | 19 | 20 |
| 21 | 22 | 23 | 24 | 25 | 26 | 27 |
| 28 | 29 | 30 | 31 |
- AATCC
- 우레탄지퍼
- 미니마카
- 클린코드
- TACKING
- 자켓실측
- 영어시간읽기
- 40HQ컨테이너40GP컨테이너차이
- 40HQ컨테이너
- Armhole Drop
- 미국영어연음
- 웹API
- 헤이큐
- 비리짐
- 필터링후복사붙여넣기
- WHATTIMEOFTHEDAY
- 엑셀필터복사붙여넣기
- MERN스택
- 요척합의
- 나일론지퍼
- 고급영어단어
- 바지실측
- 엑셀드래그단축키
- 봉제용어
- 비슬론지퍼
- 핸드캐리쿠리어차이점
- 슈퍼코딩
- 와끼
- 암홀트롭
- 엑셀자동서식
- Today
- Total
CASSIE'S BLOG
[슈퍼코딩] 94-1강 스트링 부트 Data Access Layer 좀 더 살펴보기 본문
[슈퍼코딩] 94-1강 스트링 부트 Data Access Layer 좀 더 살펴보기
ITSCASSIE1107 2024. 1. 19. 16:17일전에는 layer 주지않고 Java List로 실습
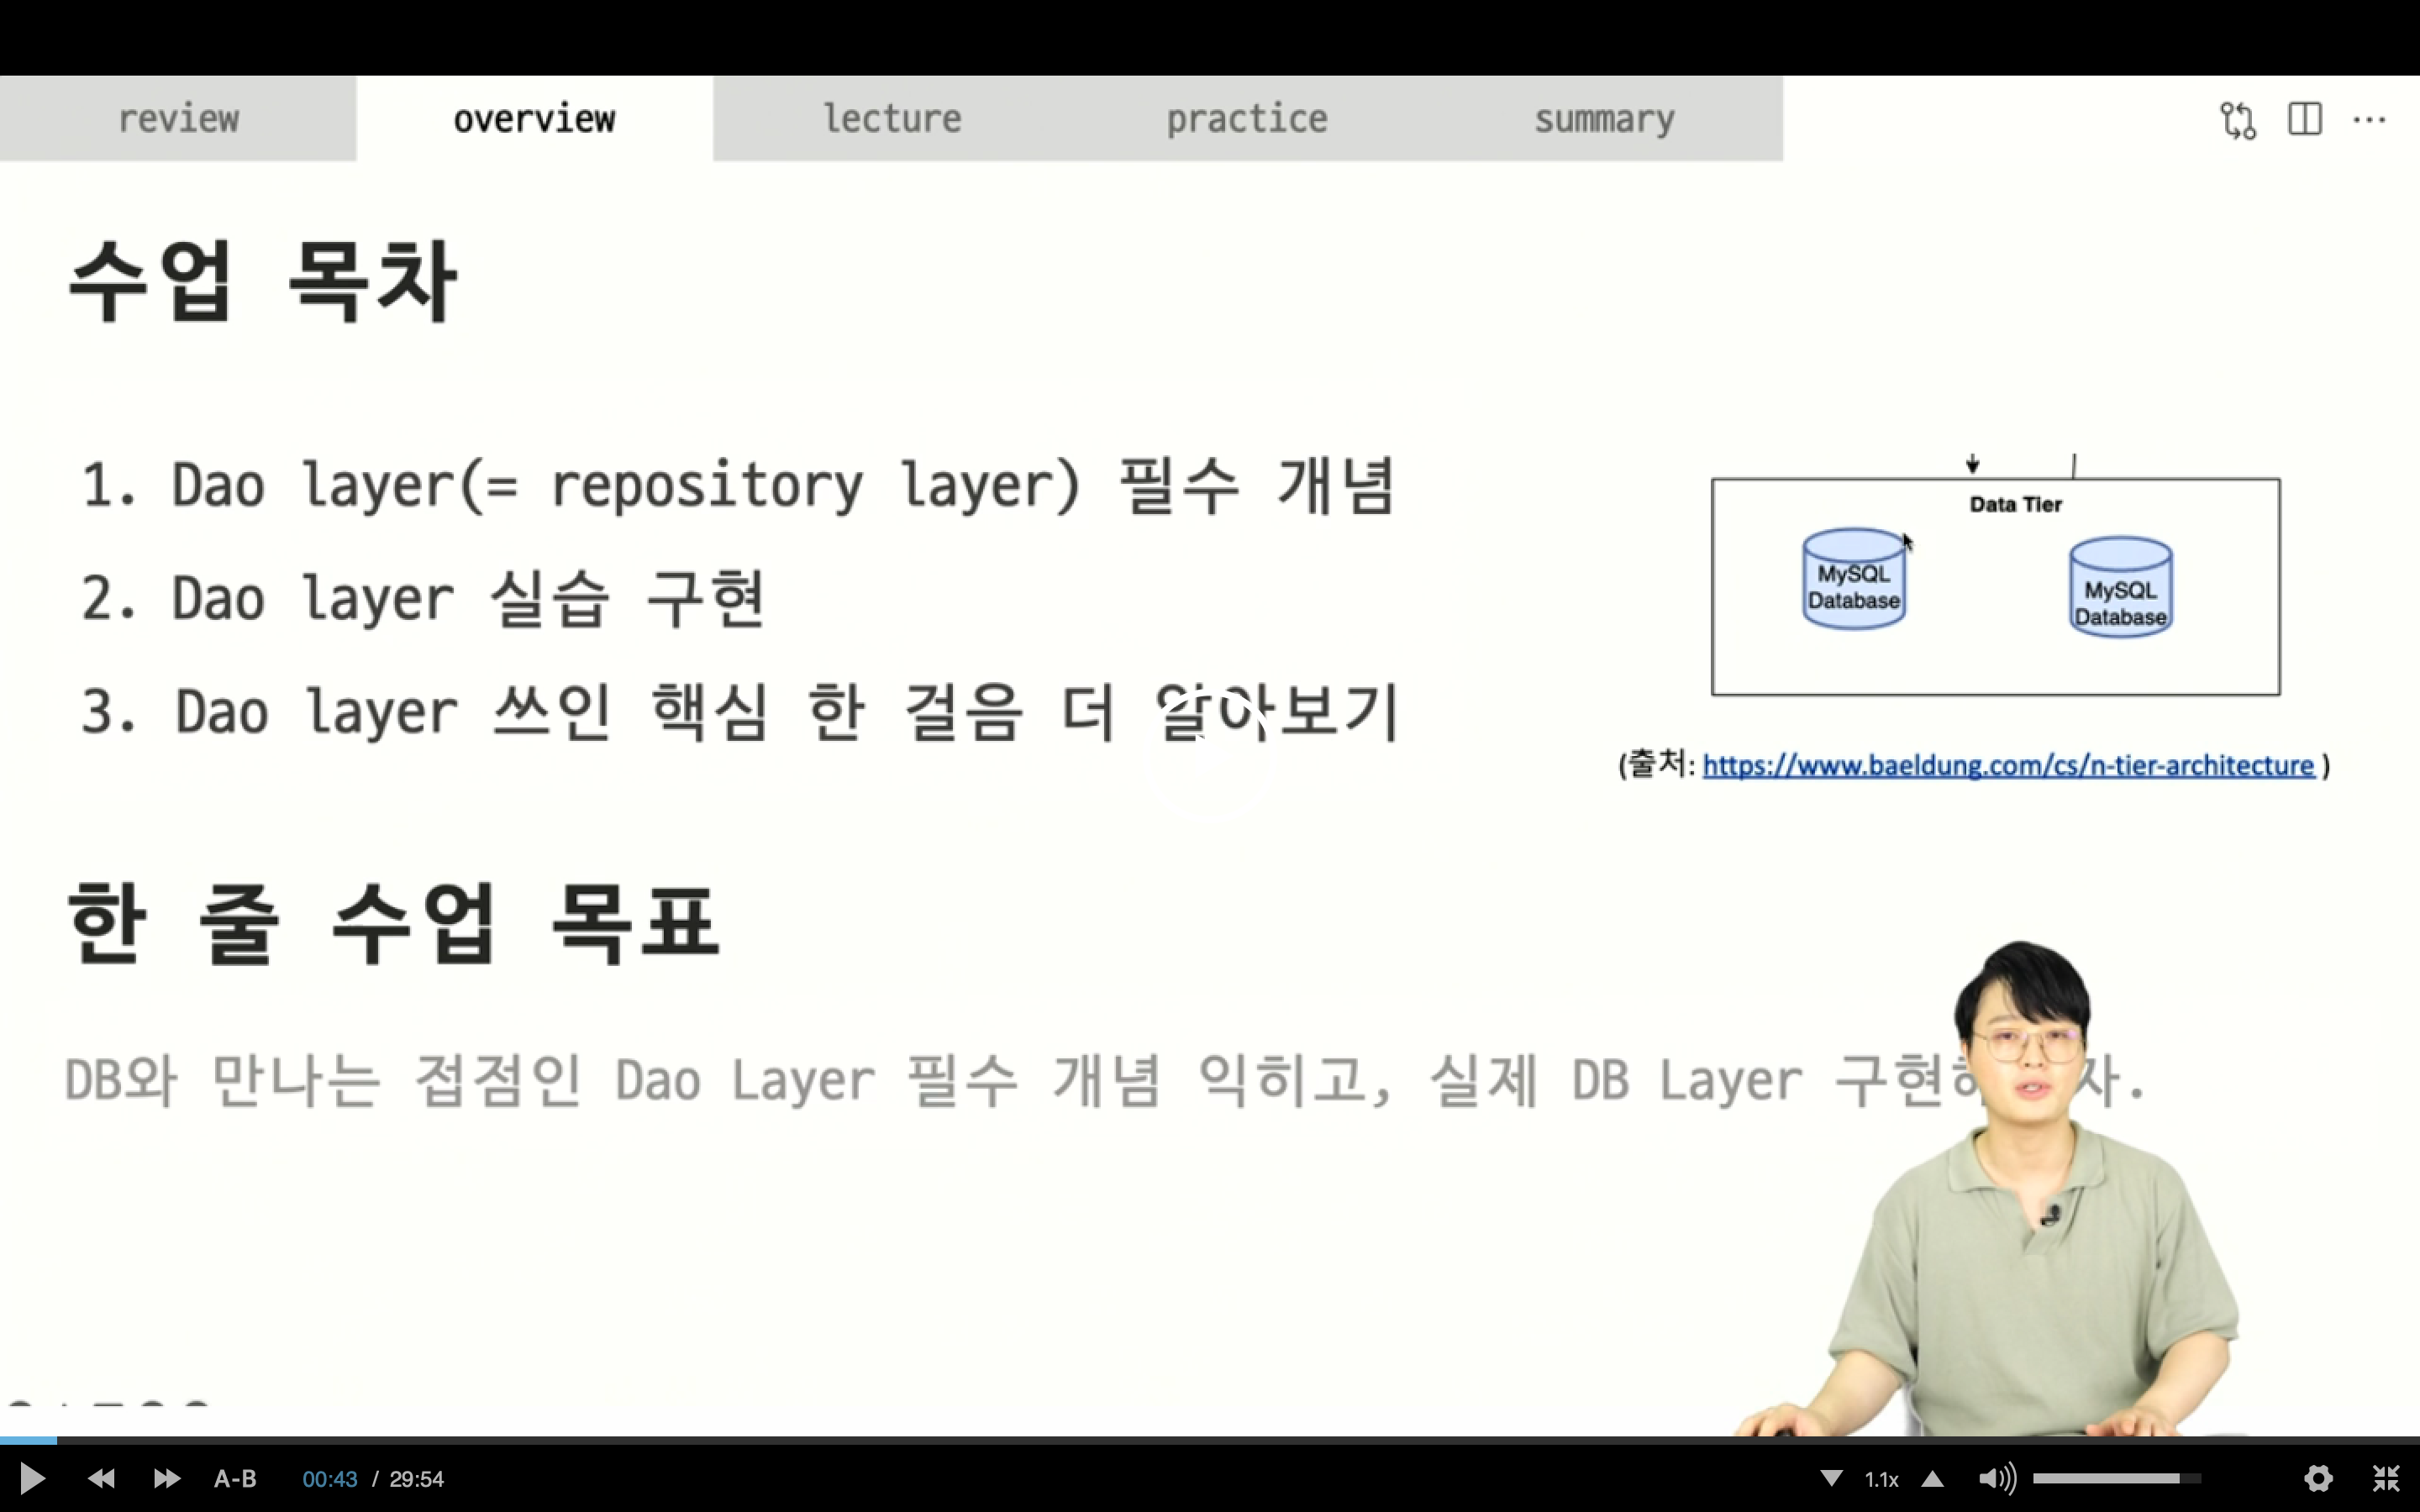
우리는 RDBMS를 배웠지만
NOSQL도 있다.
전부다 DAO LAYER와 소통할 수 있다.
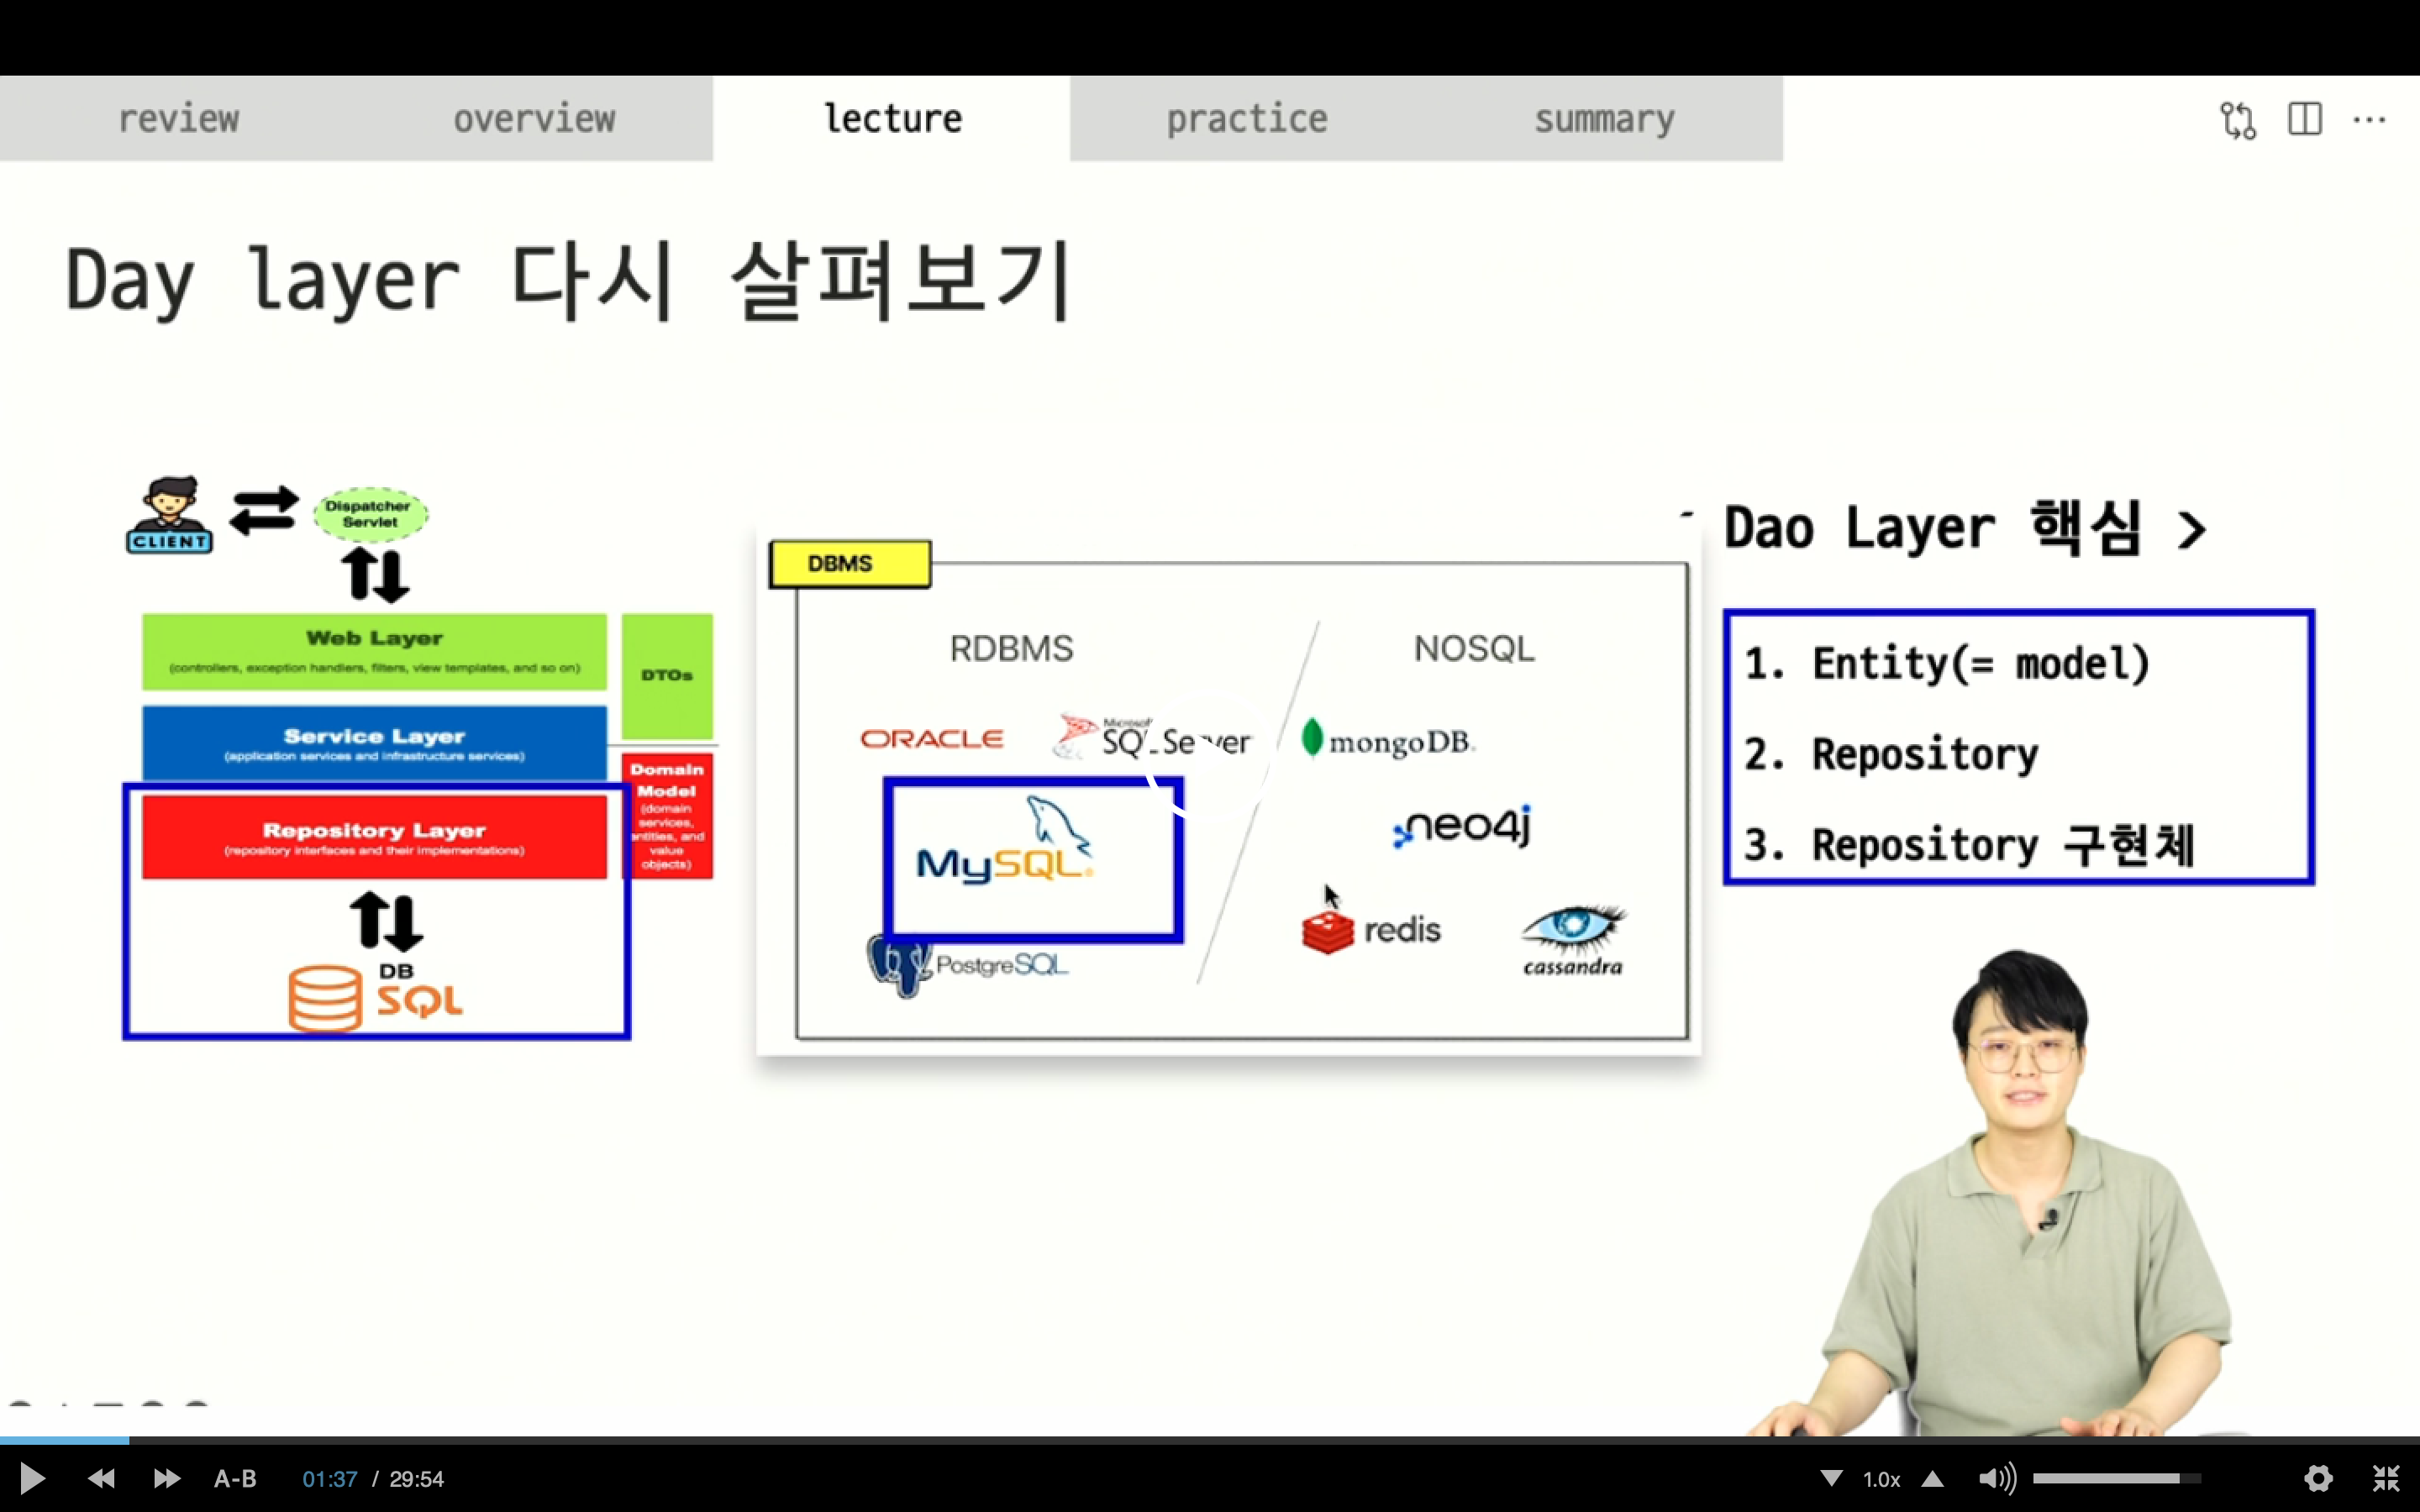
기본적으로 Entity라는 클래스는 equals나 hashcode를 id기준으로 override해야하고 getter와 setter를 구현하는게 일반적이라고함.
근데 DTO와 Entity가 비슷하게 될 경우가 많은데 간단한 프로젝트일 때는 DTO가 Entity가 거의 비슷할 경우가 많은데 그래서 많은 사람들이 DTO 와 Entity를 같이 쓴다고함.
그래서 Client와 Web에서 할 때 DTO를 쓰고 Web과 Dao일때도 DTO를 쓰고 Dao와 DB에서는 Entity라고 일컷는데 같은 경우에는 이꼴아니다 표시되어있는 부분이 같은 경우가 많은데 그렇다하더라도 "명시적으로 분리를 해야한다"
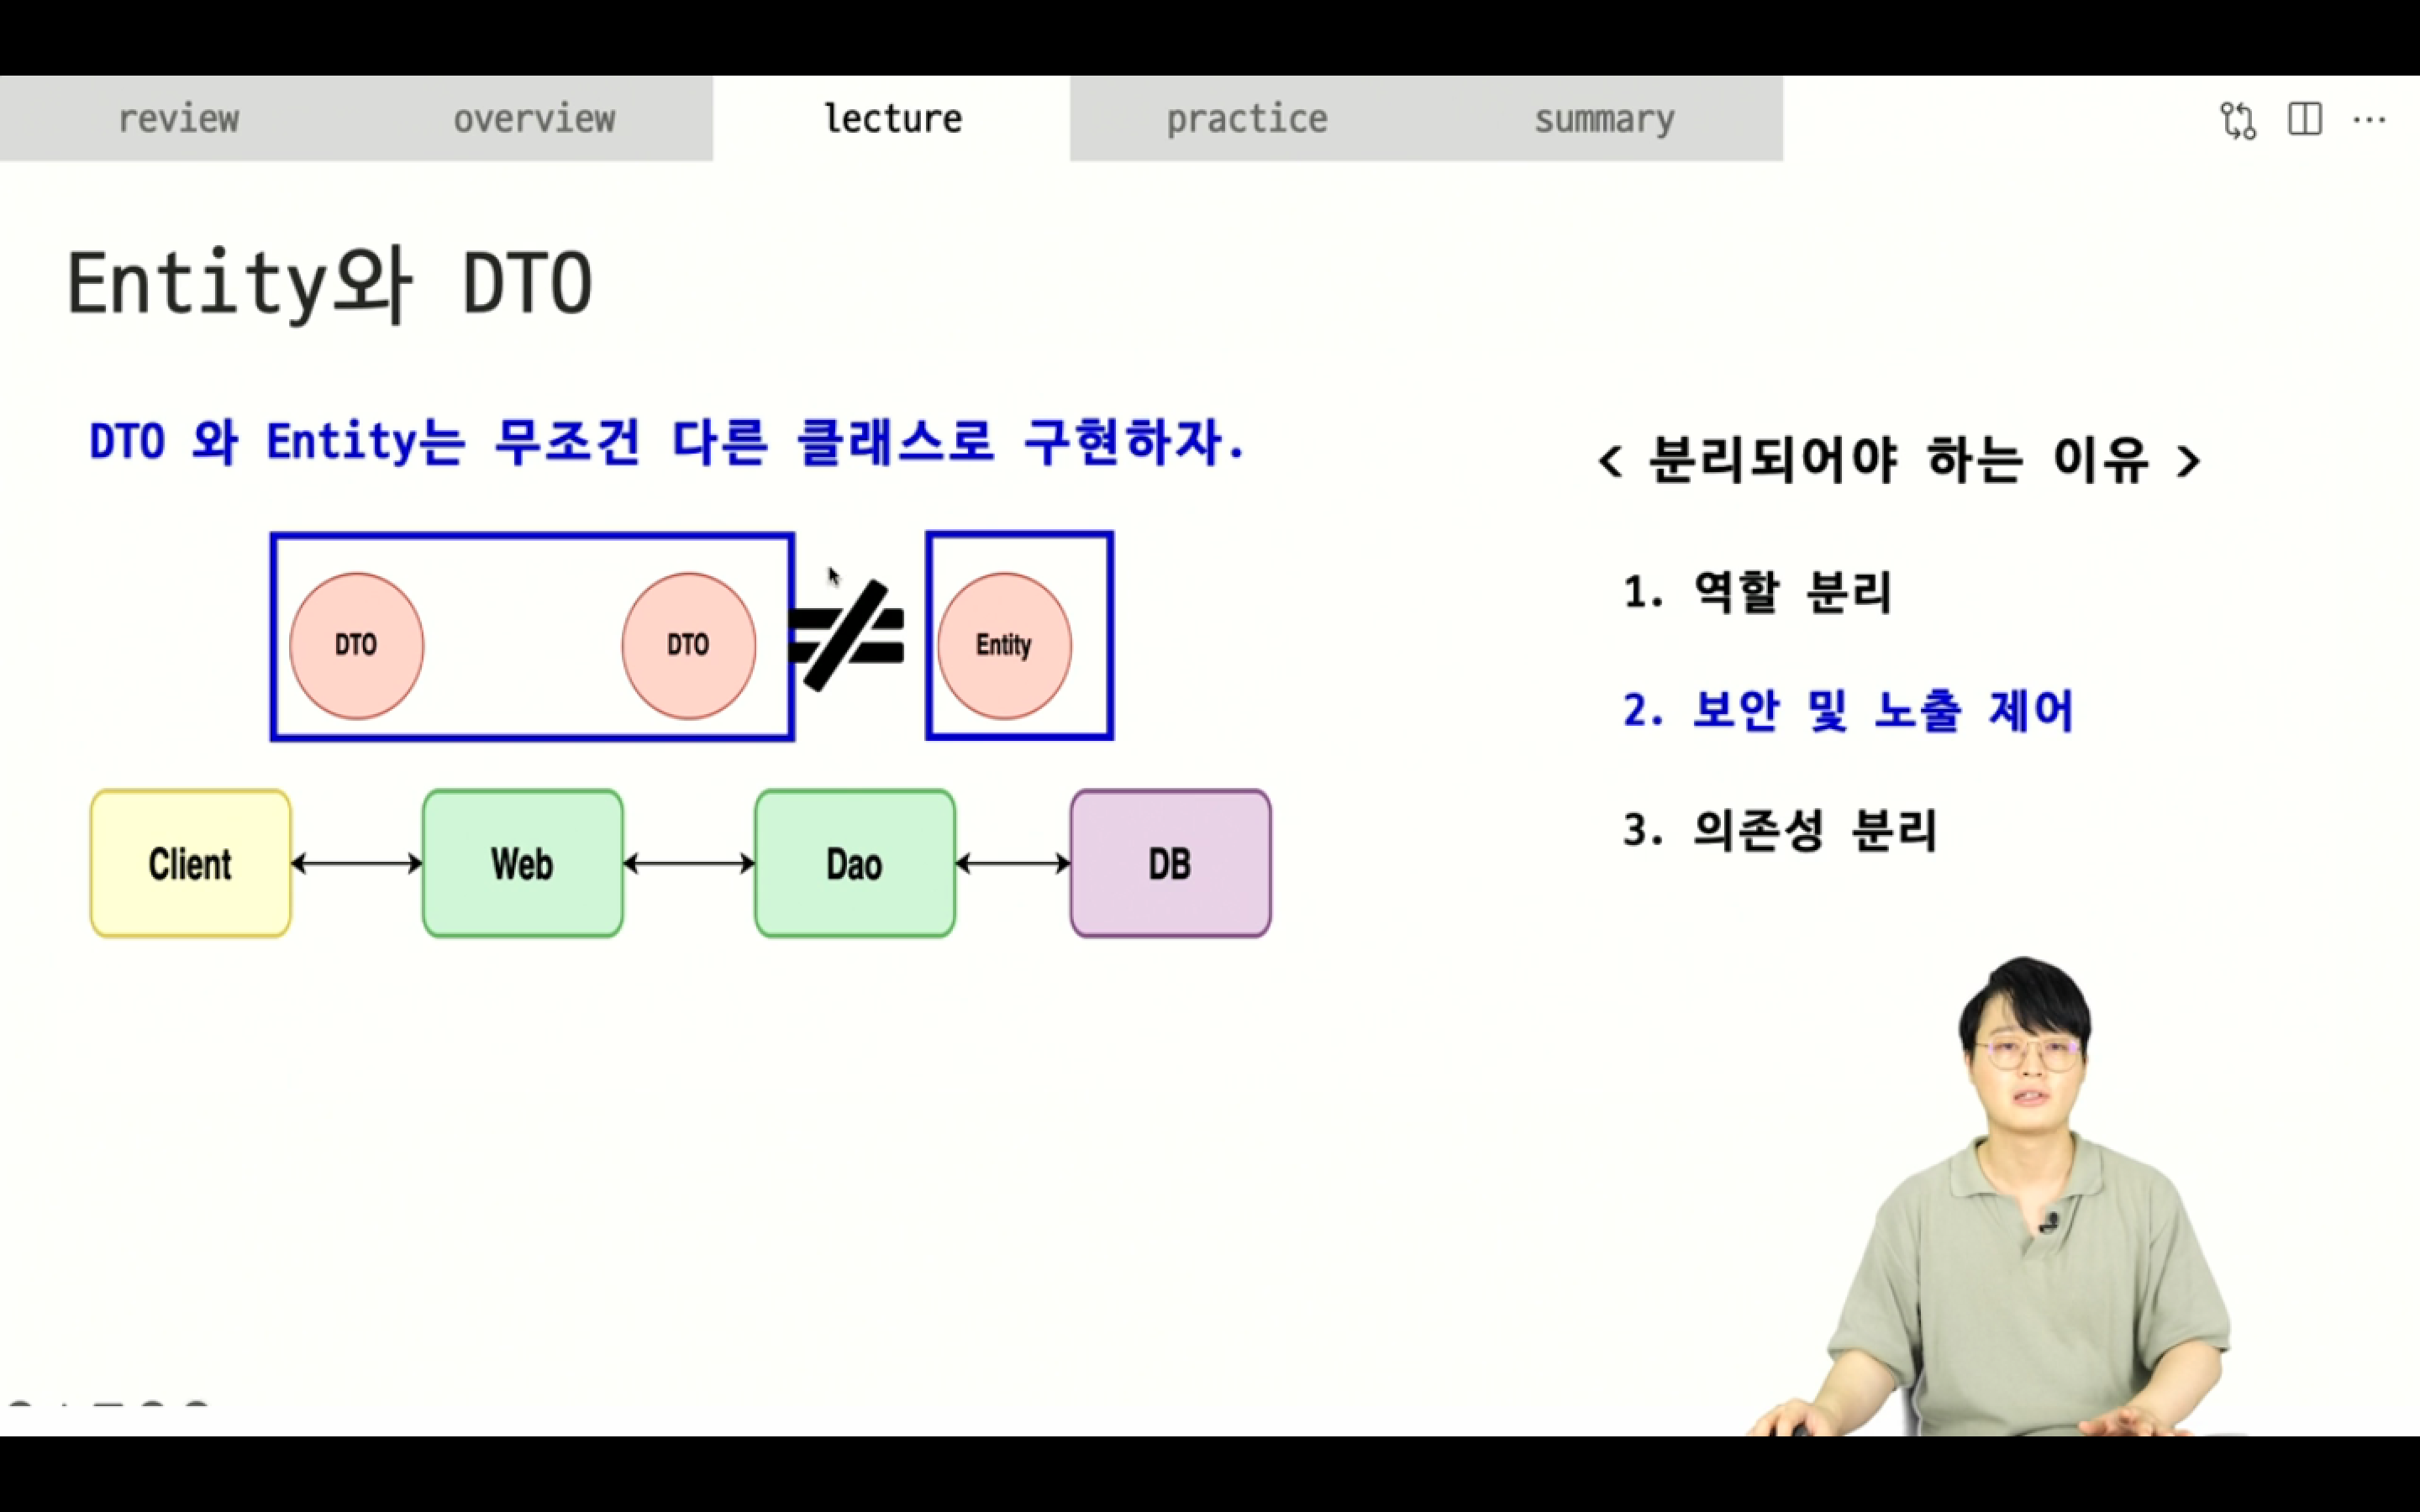
ENTITY는 DB와 자바어플리케이션간의 소통을 담당하는 친구고
DTO는 CLIENT 즉 프론트쪽이니까 자바스크립트 이런 쪽에서 자바어플리케이션의 소통을 담당해서 다른 역할을한다.
ENTITY는 DB에 있는 거기 때문에 중요한데이터들이 많다.
DTO는 필요한것만 10개중에서 2-3개만 쓰는 경우가 많아서 불필요한 10개를 다 노출될 필요가 없기 때문에
+분리를 안하면 의존성에 문제 생길 경우가 있다.
🎈Repository와 Repository 구현체에 대해서
DB DAO LAYER에서는 인터페이스를 구현을 하고 시작하는 거를 권장한다고함.
왜냐면 DB같은 경우에는 변화가 항상 많이 있을 수 있어서
DB같은 경우에도 기존에 있는 DB의 버전을 올릴 수도 있는거고 그런거에 대응하기 위해서
인터페이스를 🎈중간에 두는 것을🎈 권장을 드린다고 함.
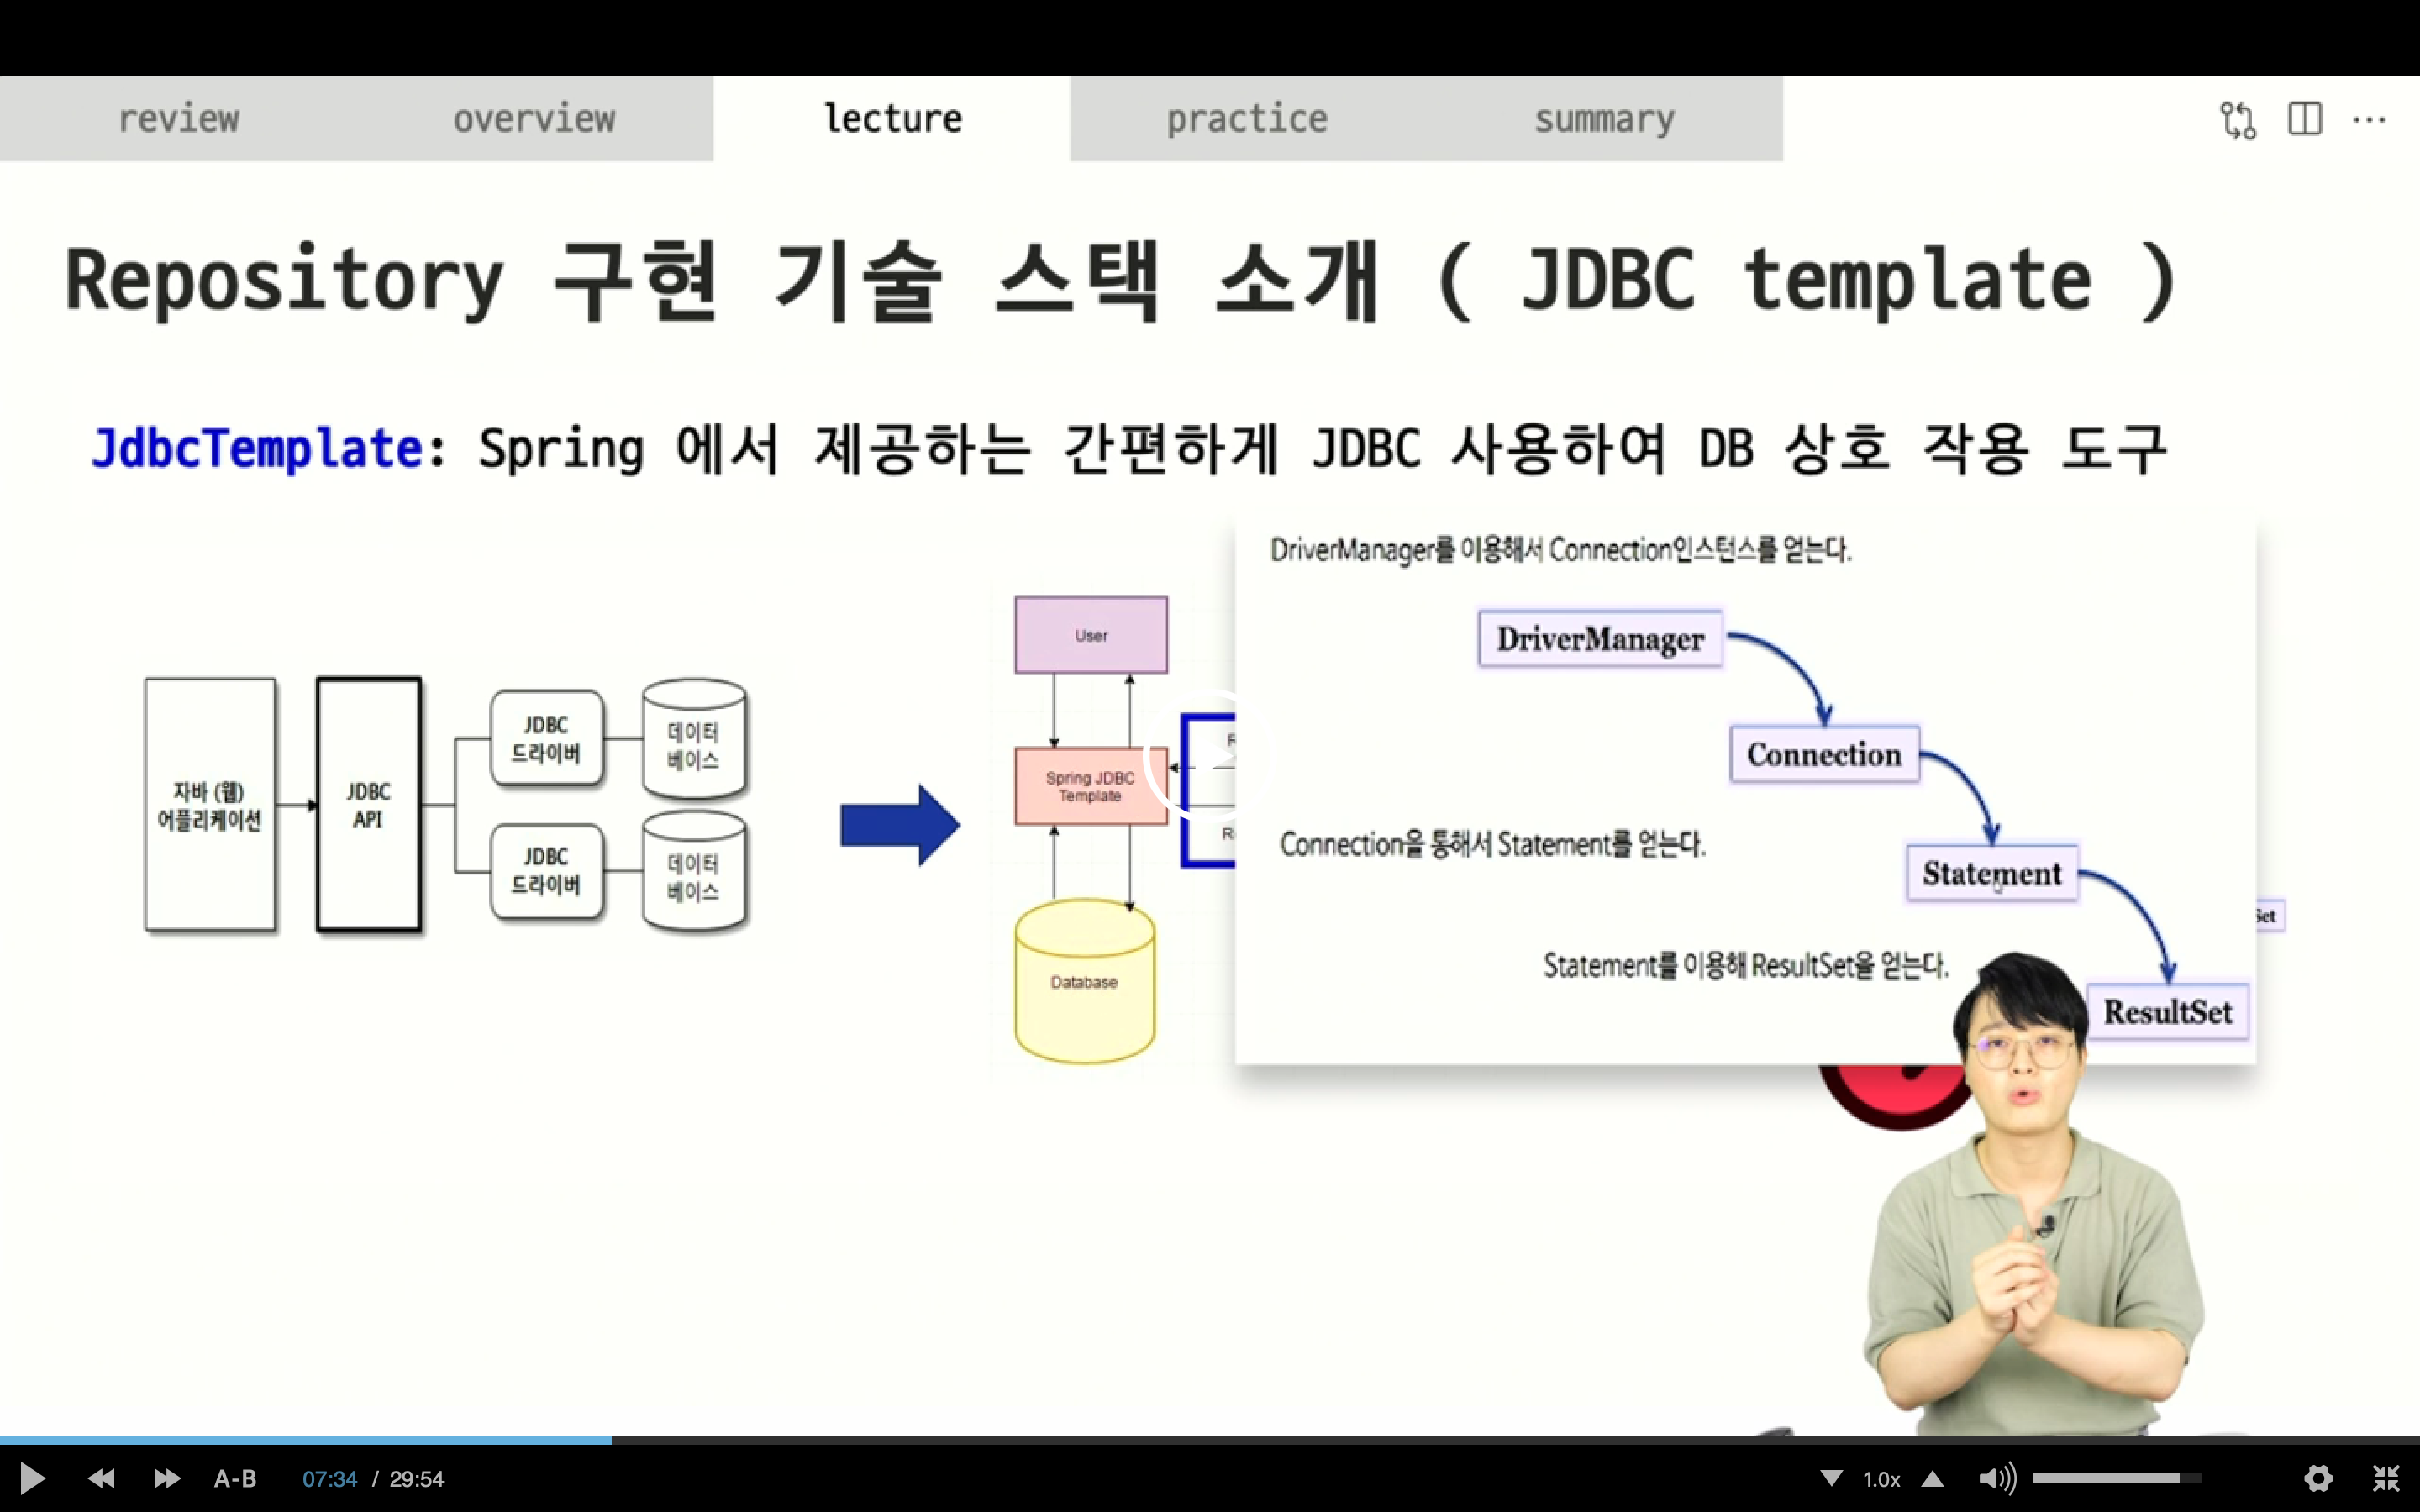
자바와 MySQL를 연결하는 기술을 JDBC라고 함
그러면 JDBCTemplate은 뭐냐 Spring에서 제공하는 툴을 JDBCTemplate이라 함
간편하게 Jdbc를 쓸 수 있게 해준다 함
내부적으로 살펴보면 JDBC Api가 내부적으로 JDBC드라이브를 해서 데이터베이스와 연결한다.
RowMapper: DB의 어떤 필드가 자바클래스의 어떤 필드로 매핑이 되야하는지를 명시하는 function interface라고 함
일단 RowMapper 같은게 필요하다 이 정도면 알면 된다고 함
옛날에 JDBC쓸 때 try해가지고 컬렉션을 열고 거기에 Sql넣고 동적인 거 넣고 끝나면은 또 닫고
JDBC템플릿을 사용하게 되면 컬렉션을 열고 닫고 일련의 과정들을 다 대신해서 해준다고 함
Impo Data Source
Spring 에서 데이터베이스와의 커넥션을 관리하고 제공하는 빈
(데이터베이스와의 커넥션을 관리할거라고 스프링에 등록을 해야한단 말임 빈 등록)
그러면 스프링이 JDBC Template할 때 알아서 매핑을 해줌
List 되어있는거 Db로 옮기는 그 작업만 하고 api는 기존에 했던 7개 그대로 쓴다함
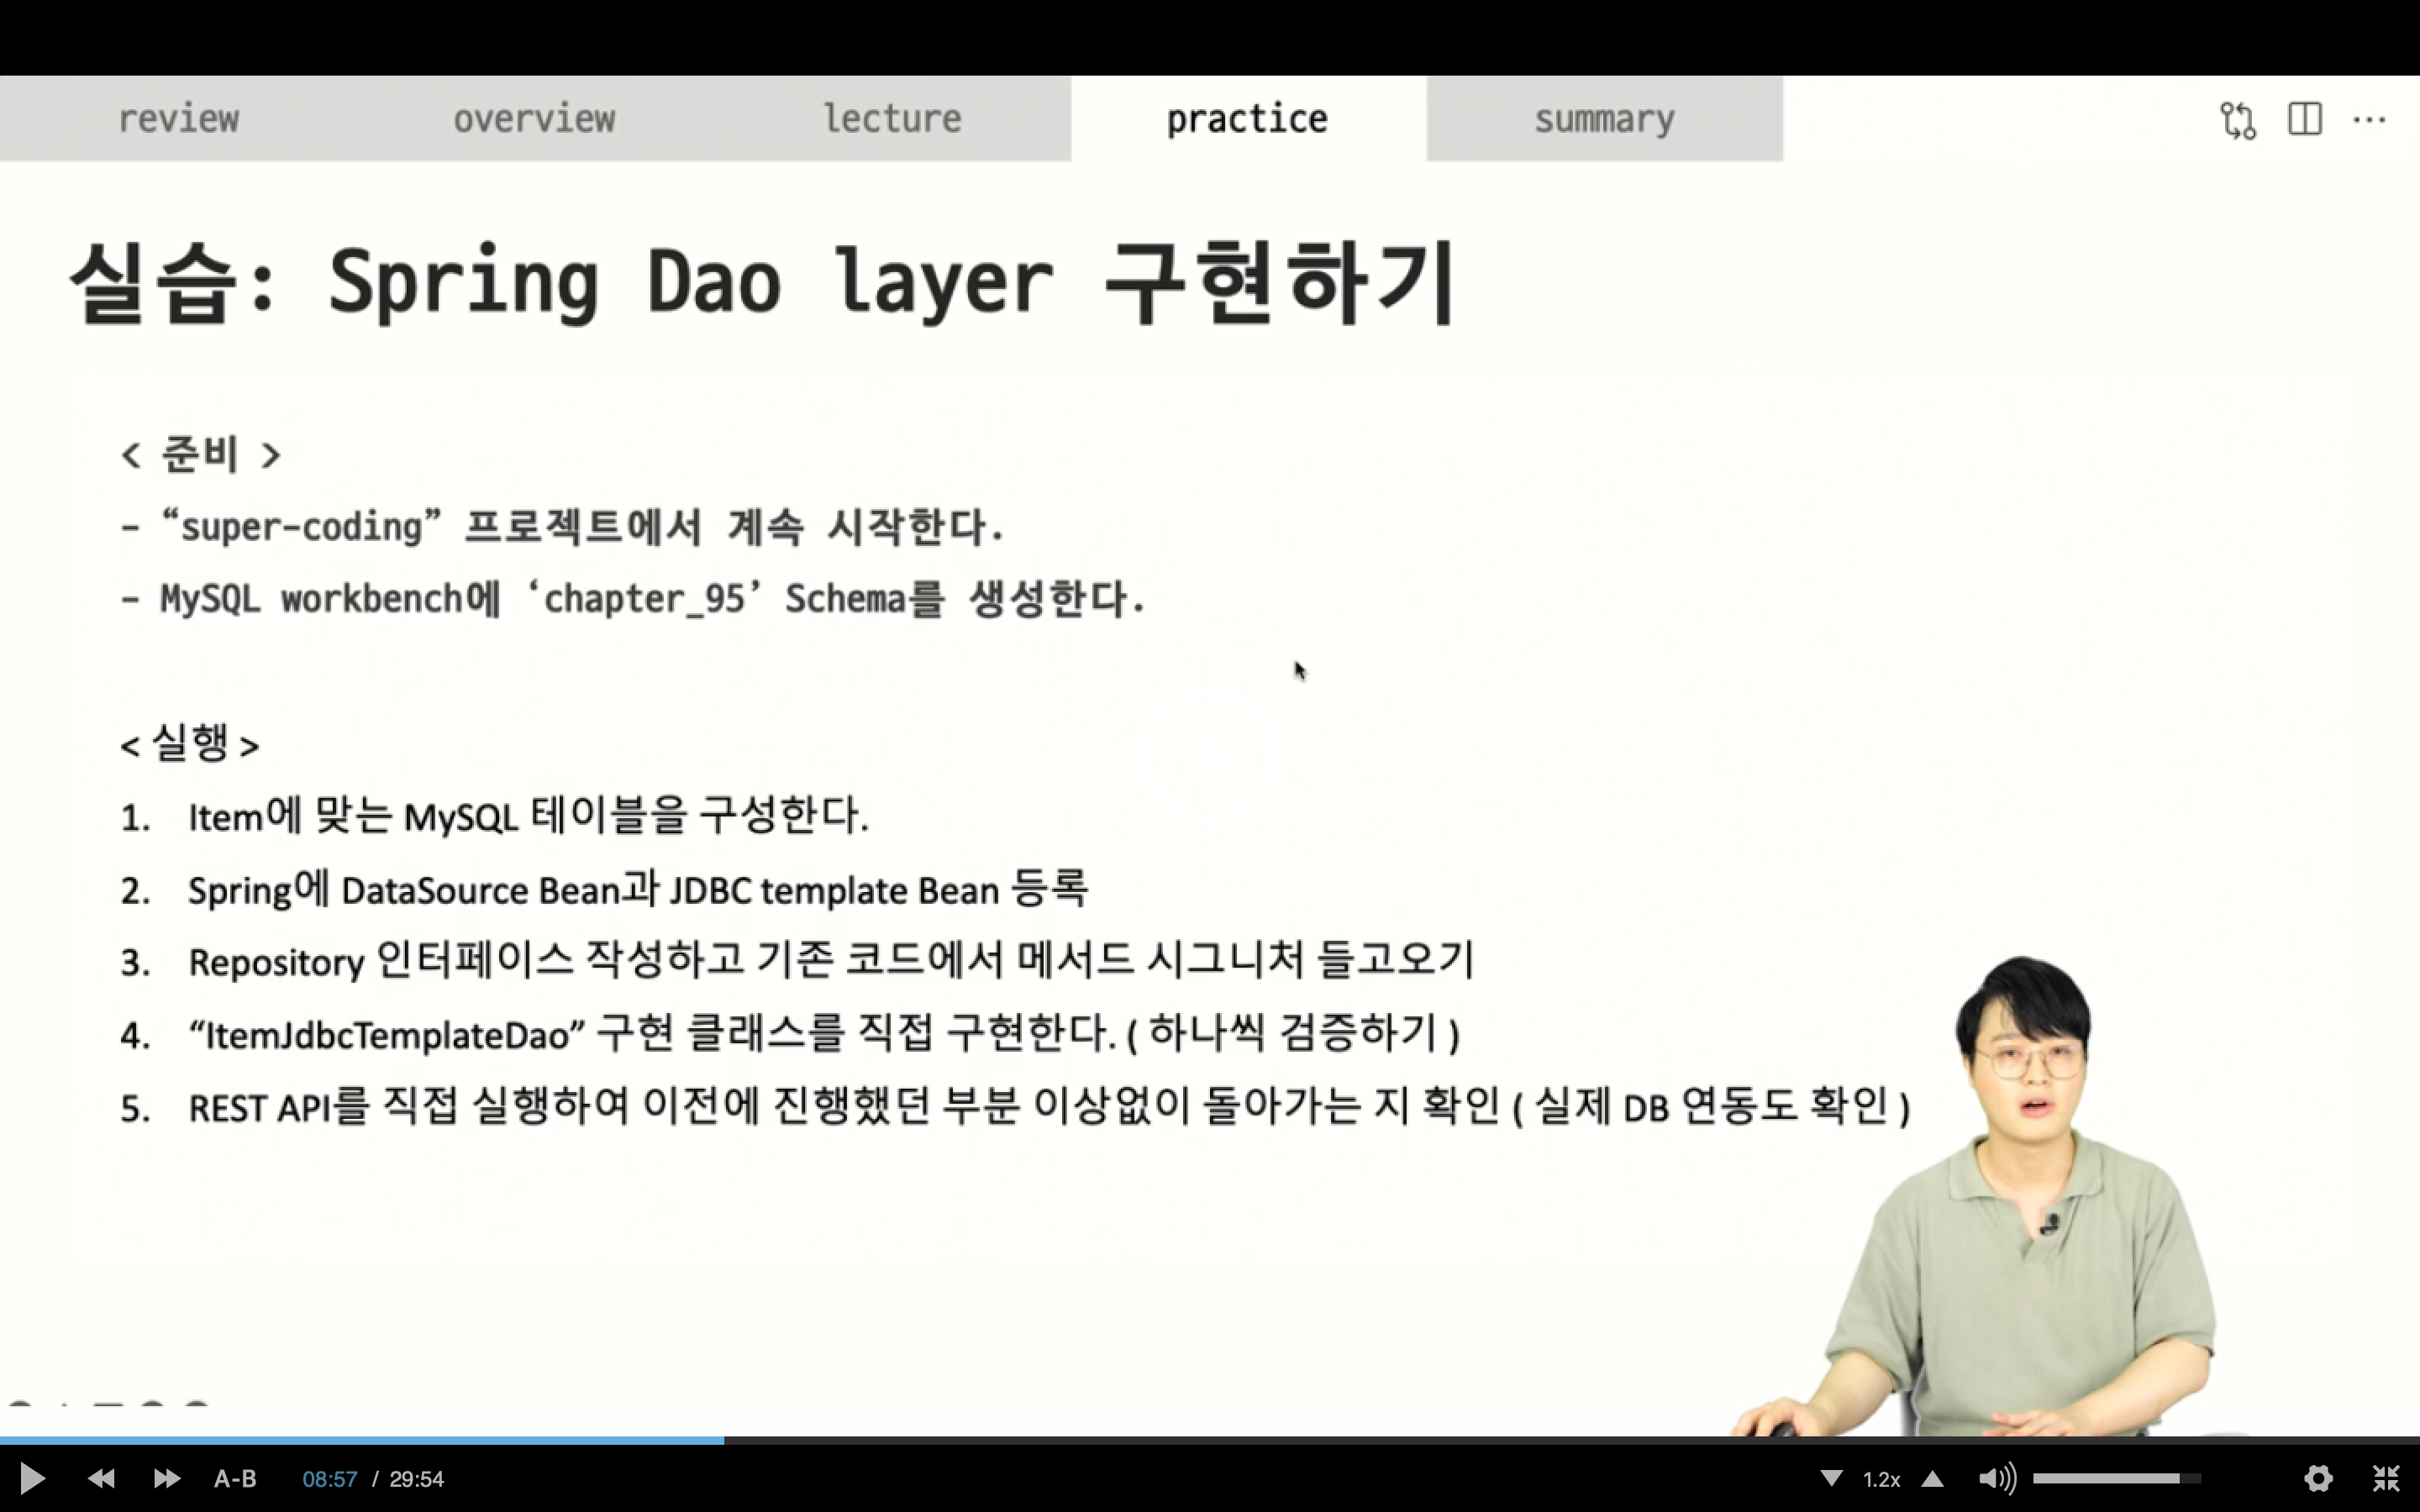
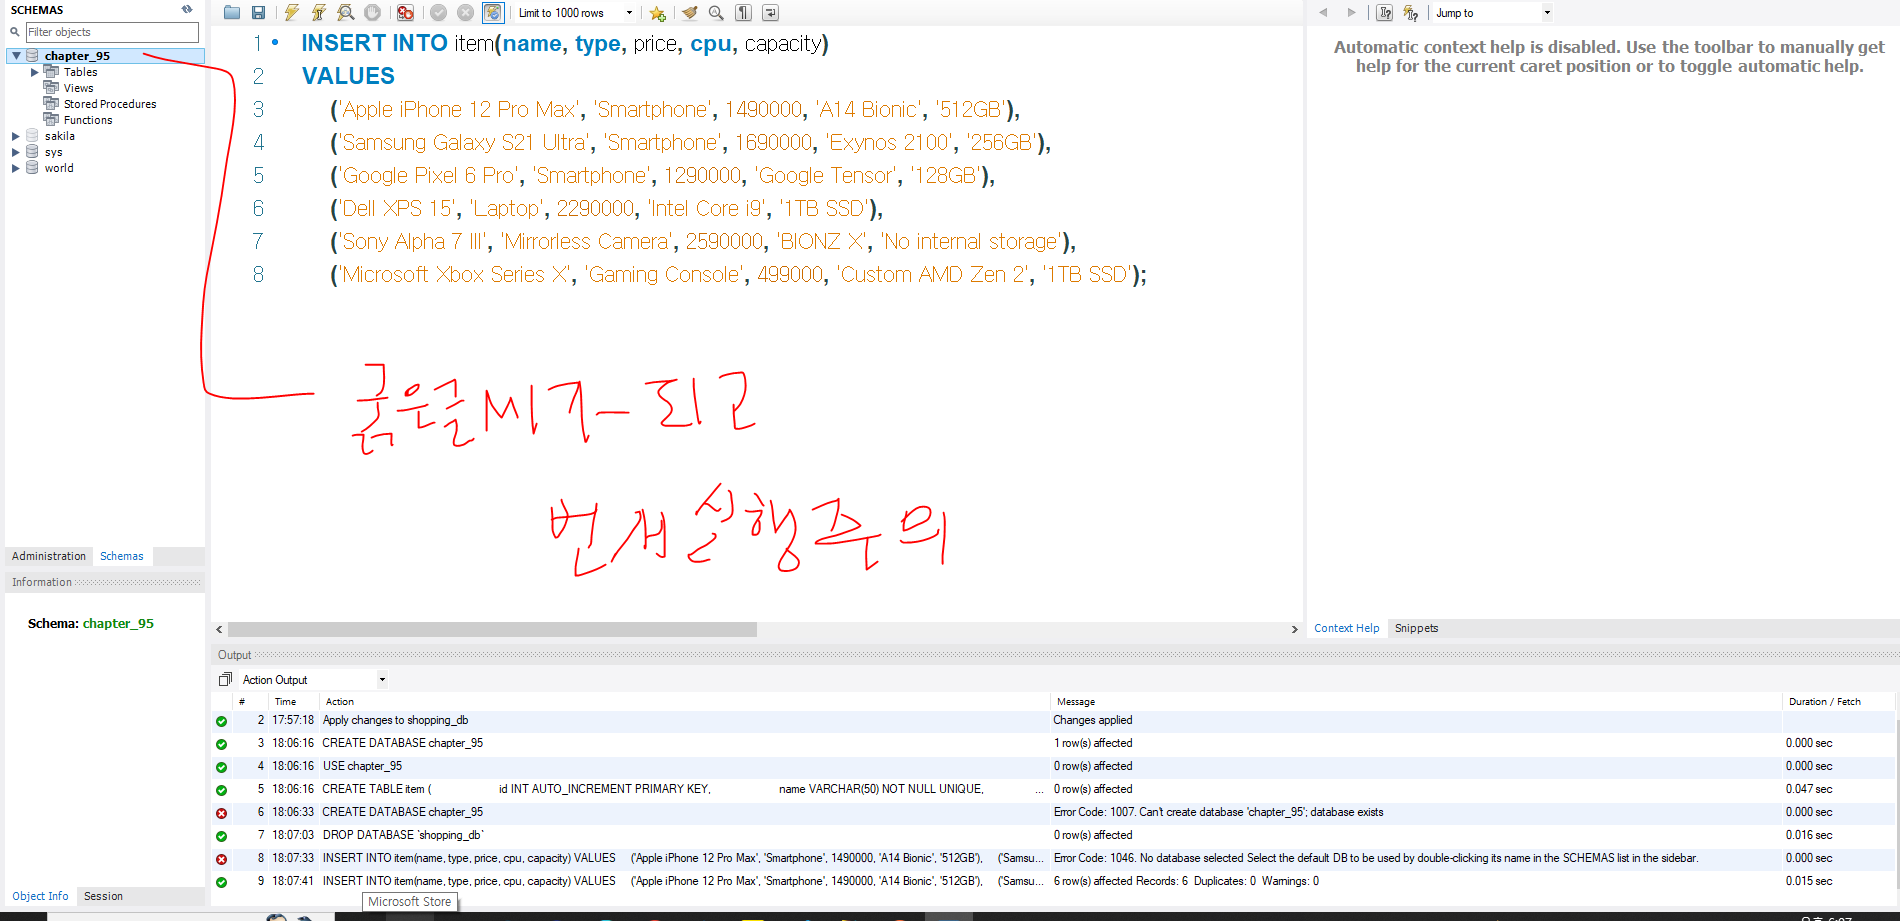
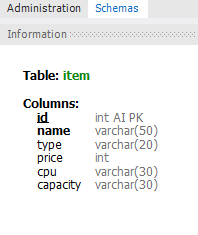
MySQL workbench에 chapter_95 schema를 먼저 만들어야함
깃허브에 올려놨으니 실행하면 된다고함.
sql 부분
CREATE DATABASE chapter_95;
USE chapter_95;
CREATE TABLE item (
id INT AUTO_INCREMENT PRIMARY KEY,
name VARCHAR(50) NOT NULL UNIQUE,
type VARCHAR(20) NOT NULL,
price INT,
cpu VARCHAR(30),
capacity VARCHAR(30)
);
DDL 부분
INSERT INTO item(name, type, price, cpu, capacity)
VALUES
('Apple iPhone 12 Pro Max', 'Smartphone', 1490000, 'A14 Bionic', '512GB'),
('Samsung Galaxy S21 Ultra', 'Smartphone', 1690000, 'Exynos 2100', '256GB'),
('Google Pixel 6 Pro', 'Smartphone', 1290000, 'Google Tensor', '128GB'),
('Dell XPS 15', 'Laptop', 2290000, 'Intel Core i9', '1TB SSD'),
('Sony Alpha 7 III', 'Mirrorless Camera', 2590000, 'BIONZ X', 'No internal storage'),
('Microsoft Xbox Series X', 'Gaming Console', 499000, 'Custom AMD Zen 2', '1TB SSD');
73강에서 실습했던거는 cpu랑 capacity가 spec이라는 거에 하위에 있었는데
굳이 spec를 분리해서 테이블을 할 필요가 없을 것 같다고 판단했다함.
요구사항에서 그때 spec안에 cpu랑 capacity 들어가있다고해서
🎈꼭 테이블은 그거를 따라갈 필요는 없다고함 🎈
이게 바로 Entity와 DTO를 다르게 해야하는 이유이기도 함.
그래서 cpu랑spec을 한 테이블에 같이 넣었다고함.
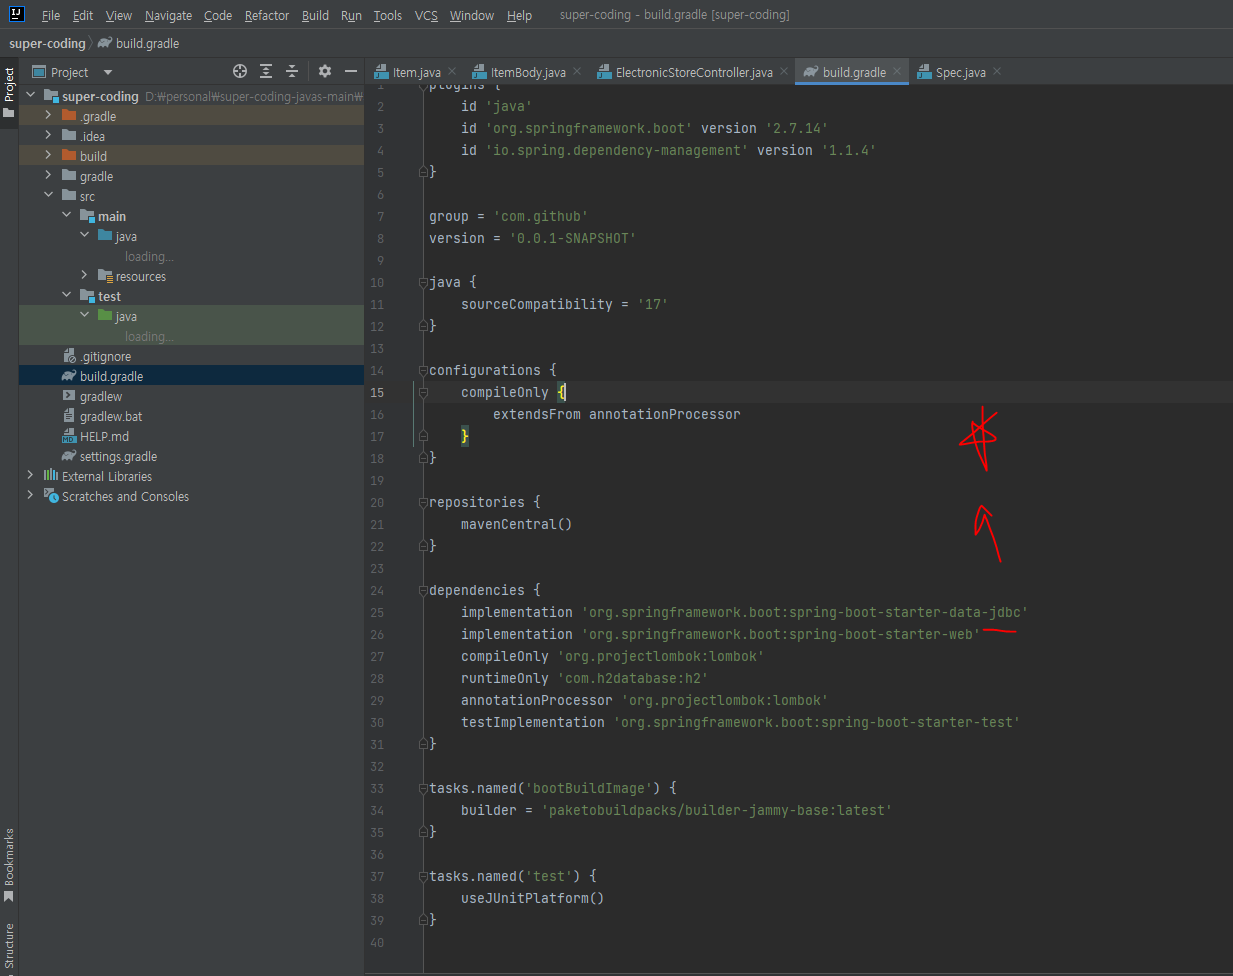
플젝 처음 구성할 때 jdbc 설정해서 build.gradle에 jdbc 설정이 되어있어야함
config 폴더 하위에 JdbcConfig 클래스 만들어주기
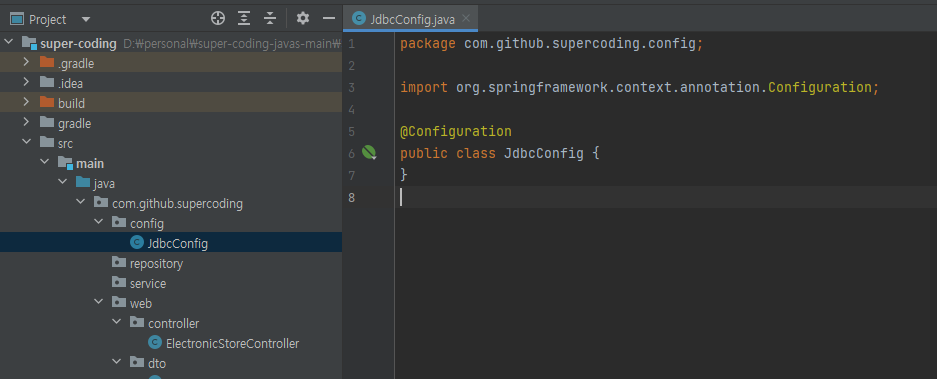
이곳은 jdbc 관련된 빈들을 등록하는 공간임.
그래서 @Configuration 어노테이션 붙여줘야함.
@Configuration 어노테이션은 해당 클래스가 스프링 설정 클래스임을 나타냅니다. 스프링 컨테이너는 이 어노테이션이 붙은 클래스를 찾아서 설정 정보를 로드하고 빈(bean)들을 등록합니다. 따라서 @Configuration 어노테이션을 사용하지 않으면 스프링은 해당 클래스를 설정으로 인식하지 않고 빈을 등록하지 않습니다.
DataSource 이거 할건데 그래야지 스프링한테 이거 사용할거라고 알려줄 수 있다고함.
DriverManagerDataSource 클래스는 스프링에서 제공하는 DataSource 구현체 중 하나입니다. DataSource는 데이터베이스 연결 정보를 제공하고, 데이터베이스와의 연결을 관리하는 인터페이스임.
⭐설정 부분⭐
dataSource에서 set를 통해서 어떤 유저인지 어디에 있는건지 다 설정을 직접 해줘야한다고 함
우리는 root를 유저네임으로 했고
패스워드도 알려줘야함
내부적으로 드라이브 클래스라는 애가 접근을 한다고 함 그래서 우리는 드라이버클래스를 어떤거를 써야하는지 알려줘야하는데 우리는 지금 MySQL
그래서 MySQL에 맞는 드라이버를 등록을 해줘야함
import org.springframework.context.annotation.Bean;
import org.springframework.context.annotation.Configuration;
import org.springframework.jdbc.datasource.DriverManagerDataSource;
import javax.sql.DataSource;
@Configuration
public class JdbcConfig {
@Bean
public DataSource dataSource(){
DriverManagerDataSource dataSource = new DriverManagerDataSource();
dataSource.setUsername("root");
dataSource.setPassword("12341234");
dataSource.setDriverClassName("com.mysql.cj.jdbc.Driver"); //이 스트링 값 넣어줘야 MySQL 드라이버 등록됨
dataSource.setUrl("jdbc:mysql://localhost:3306/chapter_95");
return dataSource;
}
}
어디로 접근할건지 URL를 마지막으로 적어준다.
jdbc:
jdbc 라는 프로토콜로 시작하고
mysql 이라는 기술이름 적고
슬래쉬 2개하고
지금 우리 내부니까 localhost (다른db서버면 다른 db서버주소를 적어야함)
포트번호는 3306
그리고 shema를 중괄호로 적어줘야함.
근데 지금 이렇게 해도 안될 때가 있는데 그러면 스키마 뒤에 쿼리문으로
이거를 또 적어줘야함
?useUnicode=true&characterEncoding=UTF-8 이거를 추가하면 된다고함.
(그냥해도 되는 사람이 있고 쿼리문까지 적어줘야되는 사람이 있다고함)
return dataSource까지 그래야 빨간줄 없어짐.
재생하면 쌤도 똑같이 같은 에러난다. 드라이버가 지금 컴퓨터에 없어서 해당 에러 나는 거임
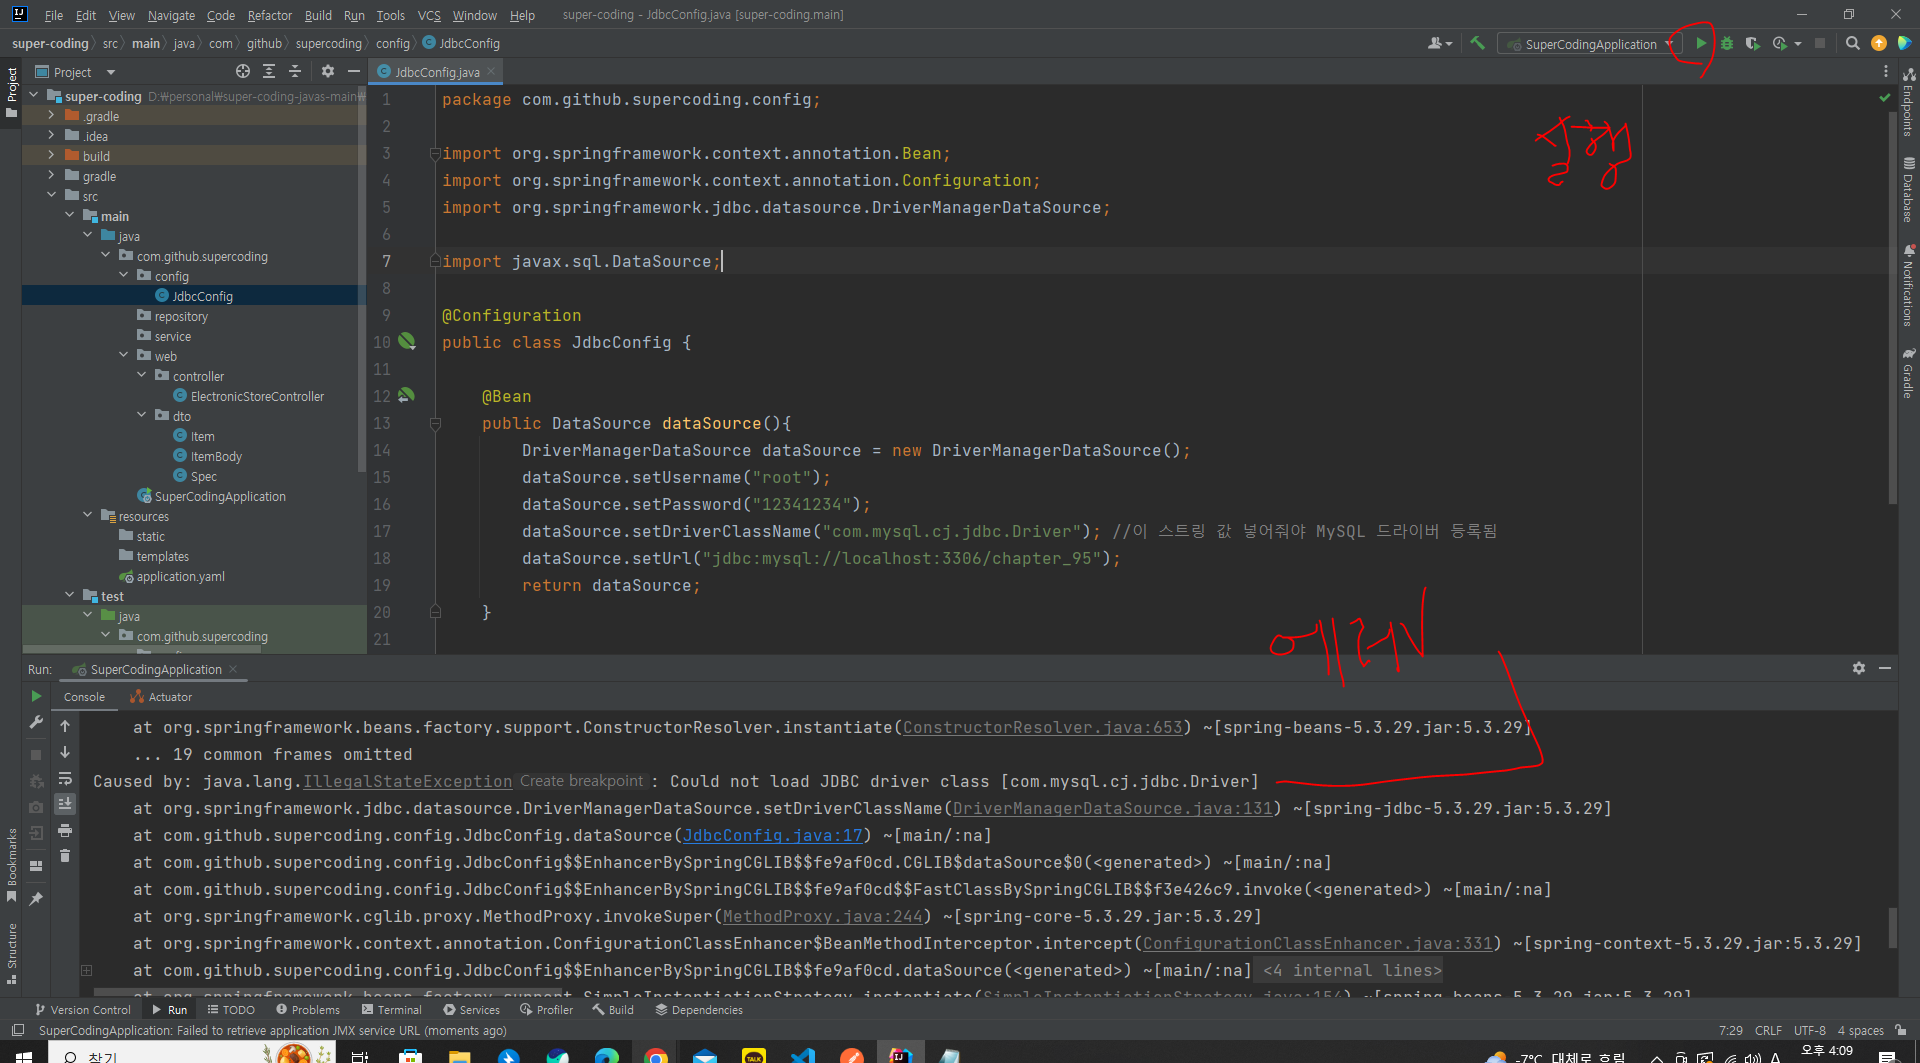
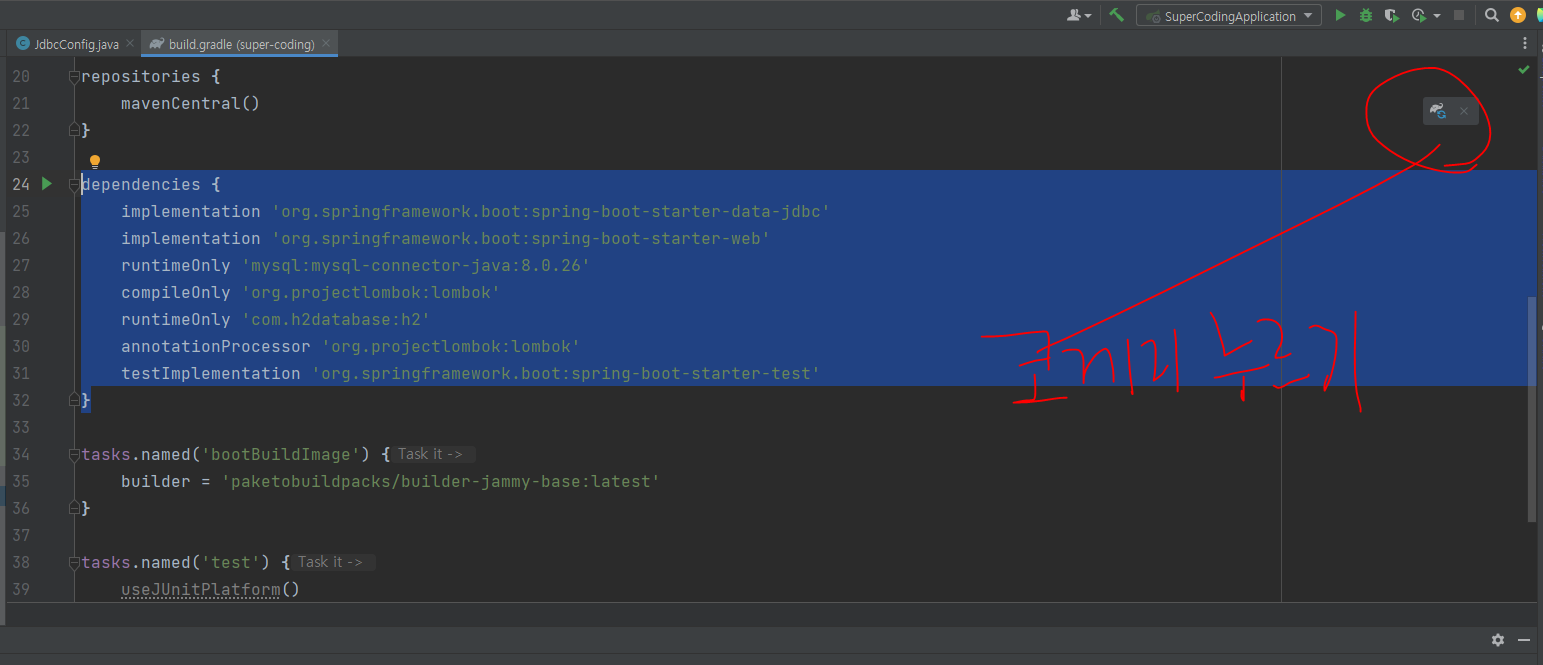
그러면 build.gradle 가서 따로 의존성을 설치를 해줘야함.
이거 그대로 복사해서 붙여준다.
runtimeOnly 'mysql:mysql-connector-java:8.0.26'
before
implementation 'org.springframework.boot:spring-boot-starter-data-jdbc'
implementation 'org.springframework.boot:spring-boot-starter-web'
compileOnly 'org.projectlombok:lombok'
runtimeOnly 'com.h2database:h2'
annotationProcessor 'org.projectlombok:lombok'
testImplementation 'org.springframework.boot:spring-boot-starter-test'
}
after
implementation 'org.springframework.boot:spring-boot-starter-data-jdbc'
implementation 'org.springframework.boot:spring-boot-starter-web'
runtimeOnly 'mysql:mysql-connector-java:8.0.26'
compileOnly 'org.projectlombok:lombok'
runtimeOnly 'com.h2database:h2'
annotationProcessor 'org.projectlombok:lombok'
testImplementation 'org.springframework.boot:spring-boot-starter-test'
}
하고나서 코끼리를 눌러준다.

실행이 되면 dataSource도 잘 등록이 된거임 이거 끝나면
jdbc Template도 등록을 해봐야함.
⭐위에 만들어진 dataSource()를 JdbcTemplate new 연산자 한거에다가 넣어줘야함
import org.springframework.context.annotation.Bean;
import org.springframework.context.annotation.Configuration;
import org.springframework.jdbc.core.JdbcTemplate;
import org.springframework.jdbc.datasource.DriverManagerDataSource;
import javax.sql.DataSource;
@Configuration
public class JdbcConfig {
@Bean
public DataSource dataSource(){
DriverManagerDataSource dataSource = new DriverManagerDataSource();
dataSource.setUsername("root");
dataSource.setPassword("12341234");
dataSource.setDriverClassName("com.mysql.cj.jdbc.Driver"); //이 스트링 값 넣어줘야 MySQL 드라이버 등록됨
dataSource.setUrl("jdbc:mysql://localhost:3306/chapter_95");
return dataSource;
}
@Bean
public JdbcTemplate jdbcTemplate(){return new JdbcTemplate(dataSource());};
}
이거까지 완료했으면 jdbcTemplate를 이용해서 Dao를 구현해본다함.
일단 repository 폴더에서 인터페이스를 먼저 정의를 해놓는다함 (이게 더 효율적이고 현업에서 그렇게 한다 했었잖아)
그러면 만들때도 Class를 만드는게 아니라 Interface를 선언을 해야한다.
ElectonicStoreItemRepository
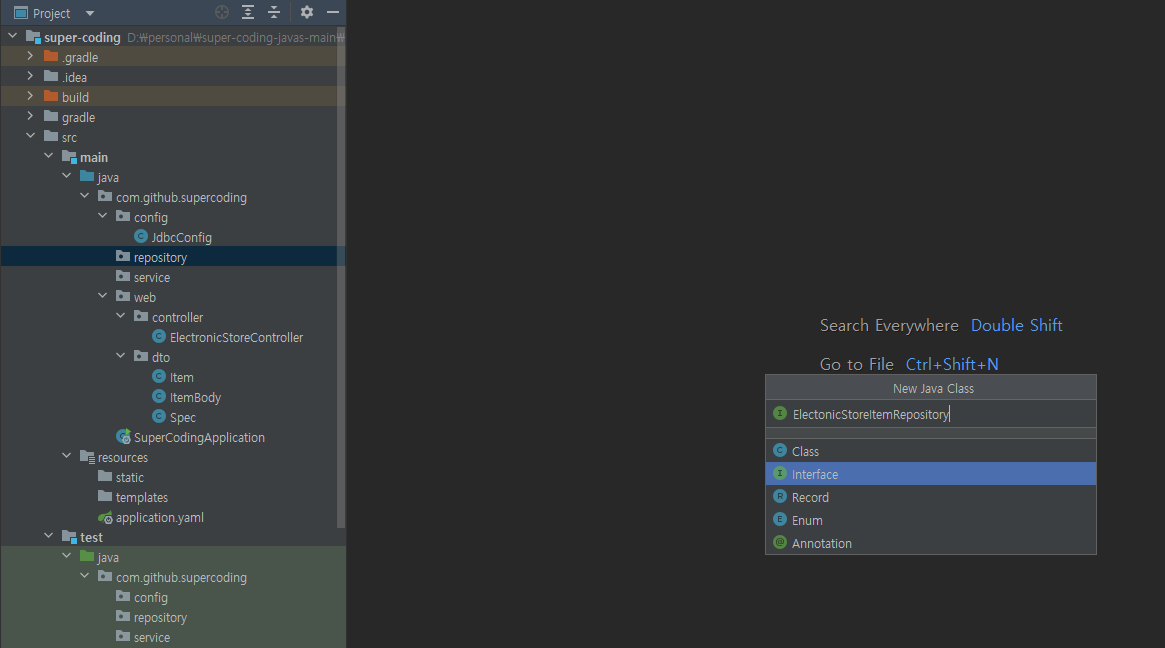
여기까지만 구현해놓고 Controller로 가기
public interface ElectonicStoreItemRepository {
}
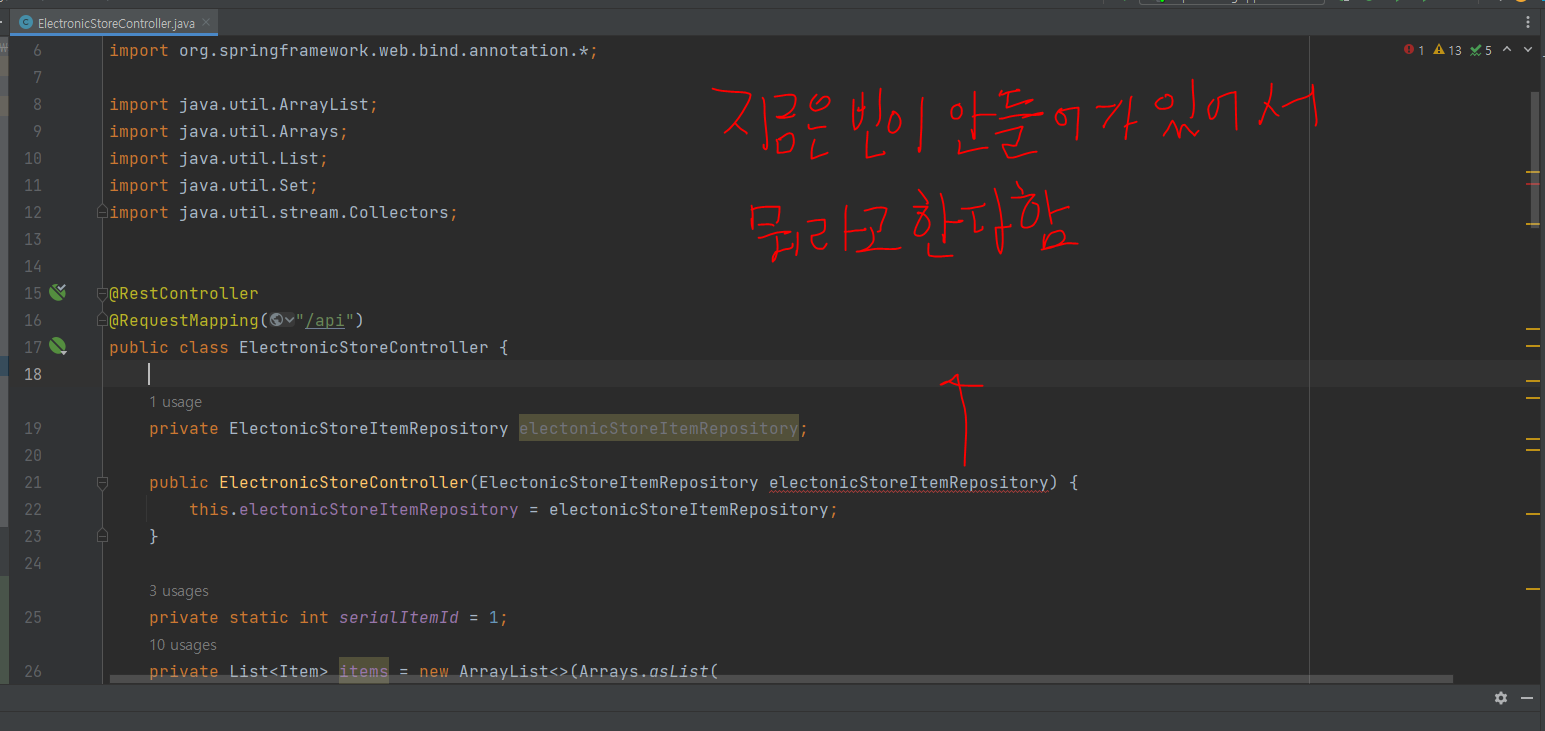
컨트롤러에서 하고싶은 것: 지금 컨트롤러가 좀 복잡한다함 원래 컨트롤러는 간단해야한다고함.
이미 복잡하잖아
import com.github.supercoding.web.dto.Item;
import com.github.supercoding.web.dto.ItemBody;
import org.springframework.web.bind.annotation.*;
import java.util.ArrayList;
import java.util.Arrays;
import java.util.List;
import java.util.Set;
import java.util.stream.Collectors;
@RestController
@RequestMapping("/api")
public class ElectronicStoreController {
private static int serialItemId = 1;
private List<Item> items = new ArrayList<>(Arrays.asList(
new Item (String.valueOf(serialItemId++), "Apple iPhone12", "Smartphone", 1490000, "A14 Bionic", "512GB"),
new Item (String.valueOf(serialItemId++), "Galaxy S12 Ultra", "Smartphone", 1490000, "A14 Bionic", "512GB")
));
@GetMapping("/items")
public List<Item> findAllItem (){
return items;
}
@PostMapping("/items")
public String registerItem(@RequestBody ItemBody itemBody){
Item newItem = new Item (serialItemId++, itemBody );
items.add(newItem);
return "ID: " + newItem.getId();
}
@GetMapping("/items/{id}")
public Item findItemByPathId(@PathVariable String id ){
Item itemfounded = items.stream()
.filter((item) -> item.getId().equals(id))
.findFirst()
.orElseThrow(()-> new RuntimeException());
return itemfounded;
}
@GetMapping("/items-query")
public Item fineItemByQueryId(@RequestParam("id") String id ){
Item itemfounded = items.stream()
.filter((item) -> item.getId().equals(id))
.findFirst()
.orElseThrow(()-> new RuntimeException());
return itemfounded;
}
@GetMapping("/items-queries")
public List<Item> fineItemByQueryId(@RequestParam("id") List<String> ids ){
Set<String> IdSet = ids.stream().collect(Collectors.toSet());
List<Item> itemsfounded = items.stream().filter((item -> IdSet.contains(item.getId()))).collect(Collectors.toList());
return itemsfounded;
}
@DeleteMapping("/items/{id}")
public String deleteItemByPathId(@PathVariable String id){
Item itemfounded = items.stream()
.filter((item) -> item.getId().equals(id))
.findFirst()
.orElseThrow(()-> new RuntimeException());
items.remove(itemfounded);
return "Object with id = " + itemfounded.getId() + "has been deleted";
}
@PutMapping("/items/{id}")
public Item updateItem (@PathVariable String id, @RequestBody ItemBody itemBody) {
Item itemfounded = items.stream()
.filter((item) -> item.getId().equals(id))
.findFirst()
.orElseThrow(()-> new RuntimeException());
items.remove(itemfounded);
Item itemUpdated = new Item(Integer.valueOf(id), itemBody);
items.add(itemUpdated);
return itemUpdated;
};
}
지금 컨트롤러의 책임을 넘어서는 코드구현이 됐다고하는데 그게 무슨 말이야? 컨트롤러는 보통 어느 역할만 해야해?
- Controller (컨트롤러):
- 컨트롤러는 웹 요청을 받아서 비즈니스 로직을 수행하고, 그에 맞는 응답을 생성하는 역할을 합니다.
- 주로 RESTful API에서는 요청된 자원에 대한 처리를 담당합니다.
- DTO (Data Transfer Object):
- Item 클래스와 ItemBody 클래스는 데이터 전송을 위한 객체로 사용됩니다. 컨트롤러는 클라이언트로부터 받은 데이터를 이러한 객체로 변환하고, 응답할 때도 이를 클라이언트로 보내게 됩니다.
- HTTP Methods (HTTP 메서드):
- @GetMapping, @PostMapping, @DeleteMapping, @PutMapping 등은 각각 HTTP의 GET, POST, DELETE, PUT 메서드에 대응합니다. 이를 통해 클라이언트의 다양한 요청을 처리할 수 있습니다.
- CRUD (Create, Read, Update, Delete):
- registerItem, findAllItem, findItemByPathId, deleteItemByPathId, updateItem 등의 메서드는 각각 데이터의 생성, 조회, 업데이트, 삭제를 담당합니다
- registerItem, findAllItem, findItemByPathId, deleteItemByPathId, updateItem 등의 메서드는 각각 데이터의 생성, 조회, 업데이트, 삭제를 담당합니다
맞습니다. 간단하게 말하면 컨트롤러는 REST API를 통해 클라이언트로부터 요청을 받아서 해당 요청에 따른 비즈니스 로직을 처리하고, 그 결과에 따른 응답을 생성하는 역할을 합니다. 컨트롤러는 주로 사용자와의 상호작용을 담당하며, ⭐비즈니스 로직은 보통 서비스(Service) 레이어에서 분리하여 처리하는 것이 권장⭐됩니다. 이렇게 하면 코드가 모듈화되어 관리하기 쉬워지고, 유지보수가 용이해집니다.
⭐ 근데 지금 내가 알려준 코드는 service에서 처리해야하는 부분까지 다 Controller에 들어있다는 말이지? ⭐
맞습니다. 현재 코드에서는 ⭐비즈니스 로직이 컨트롤러(ElectronicStoreController)에 직접 구현 ⭐ 되어 있습니다. 일반적으로는 컨트롤러에서 비즈니스 로직을 처리하는 것이 아니라, 비즈니스 로직을 별도의 서비스(Service) 클래스에 분리하여 구현하는 것이 권장됩니다.
Controller에 와서
private ElectornictoreItemRepository electronicStoreItemRepository;
필드 하기처럼 하나만 추가하는 생성자 만들기
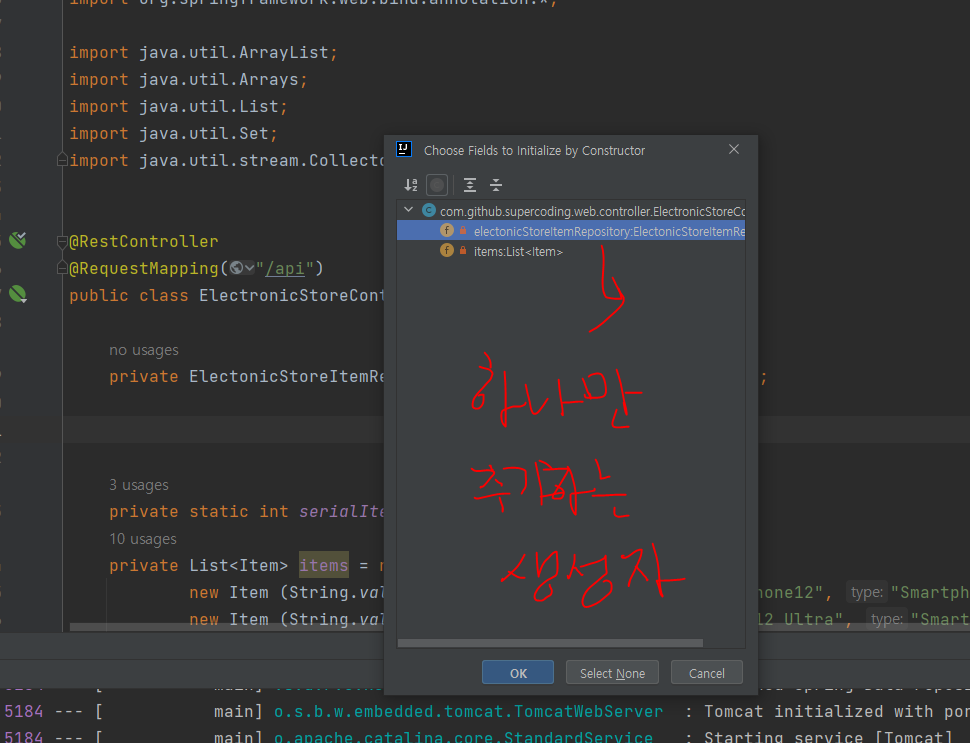
추가한뒤 이렇게
import com.github.supercoding.repository.ElectonicStoreItemRepository;
import com.github.supercoding.web.dto.Item;
import com.github.supercoding.web.dto.ItemBody;
import org.springframework.web.bind.annotation.*;
import java.util.ArrayList;
import java.util.Arrays;
import java.util.List;
import java.util.Set;
import java.util.stream.Collectors;
@RestController
@RequestMapping("/api")
public class ElectronicStoreController {
private ElectonicStoreItemRepository electonicStoreItemRepository;
public ElectronicStoreController(ElectonicStoreItemRepository electonicStoreItemRepository) {
this.electonicStoreItemRepository = electonicStoreItemRepository;
}
private static int serialItemId = 1;
private List<Item> items = new ArrayList<>(Arrays.asList(
new Item (String.valueOf(serialItemId++), "Apple iPhone12", "Smartphone", 1490000, "A14 Bionic", "512GB"),
new Item (String.valueOf(serialItemId++), "Galaxy S12 Ultra", "Smartphone", 1490000, "A14 Bionic", "512GB")
));
@GetMapping("/items")
public List<Item> findAllItem (){
return items;
}
@PostMapping("/items")
public String registerItem(@RequestBody ItemBody itemBody){
Item newItem = new Item (serialItemId++, itemBody );
items.add(newItem);
return "ID: " + newItem.getId();
}
@GetMapping("/items/{id}")
public Item findItemByPathId(@PathVariable String id ){
Item itemfounded = items.stream()
.filter((item) -> item.getId().equals(id))
.findFirst()
.orElseThrow(()-> new RuntimeException());
return itemfounded;
}
@GetMapping("/items-query")
public Item fineItemByQueryId(@RequestParam("id") String id ){
Item itemfounded = items.stream()
.filter((item) -> item.getId().equals(id))
.findFirst()
.orElseThrow(()-> new RuntimeException());
return itemfounded;
}
@GetMapping("/items-queries")
public List<Item> fineItemByQueryId(@RequestParam("id") List<String> ids ){
Set<String> IdSet = ids.stream().collect(Collectors.toSet());
List<Item> itemsfounded = items.stream().filter((item -> IdSet.contains(item.getId()))).collect(Collectors.toList());
return itemsfounded;
}
@DeleteMapping("/items/{id}")
public String deleteItemByPathId(@PathVariable String id){
Item itemfounded = items.stream()
.filter((item) -> item.getId().equals(id))
.findFirst()
.orElseThrow(()-> new RuntimeException());
items.remove(itemfounded);
return "Object with id = " + itemfounded.getId() + "has been deleted";
}
@PutMapping("/items/{id}")
public Item updateItem (@PathVariable String id, @RequestBody ItemBody itemBody) {
Item itemfounded = items.stream()
.filter((item) -> item.getId().equals(id))
.findFirst()
.orElseThrow(()-> new RuntimeException());
items.remove(itemfounded);
Item itemUpdated = new Item(Integer.valueOf(id), itemBody);
items.add(itemUpdated);
return itemUpdated;
};
}
이제 하나하나씩 바꿔본다함
before
@GetMapping("/items")
public List<Item> findAllItem (){
return items;
}
after: 무조건 repository를 거쳐서만 데이터를 들고오도록 처리할 거임 findAllItem() 메소드 호출하고 Repository 거기서 해당 메소드 만들 예정
public List<Item> findAllItem (){
return electonicStoreItemRepository.findAllItems();
}
그러면 빨간줄 뜨니까 자동으로 인터페이스에 해당 메소드 생김
import com.github.supercoding.web.dto.Item;
import java.util.List;
public interface ElectonicStoreItemRepository {
List<Item> findAllItems();
}
그 다음 실제로 items를 가지고 와야하는데 지금 인터페이스에 적혀있지만 실제 인터페이스를 구현한 ⭐구현체가 있어야한다함 ⭐
그래서 repository폴더 하위에 또
⭐ ElectornicStoreItemJdbcDao 클래스를 만들어준다. ⭐
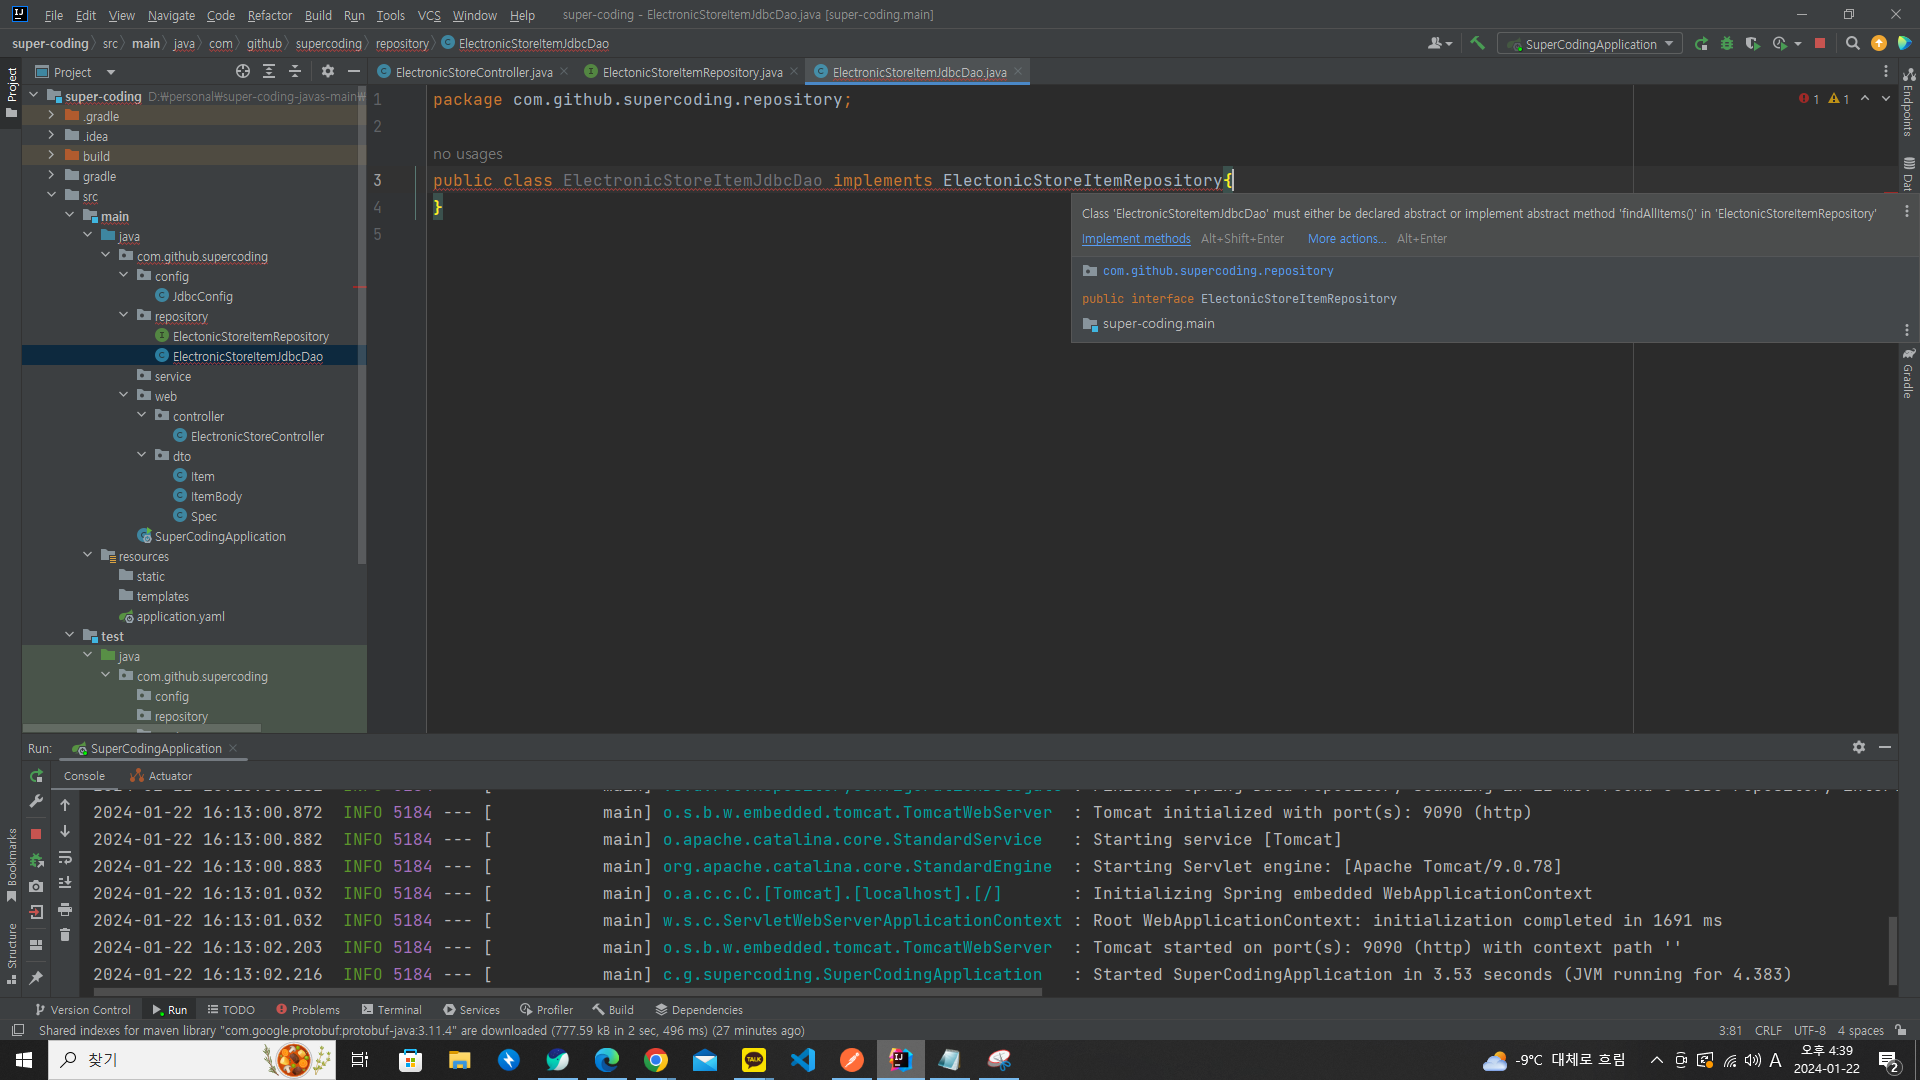
그러면 implements 할 메소드 설정하라고 뜸 거기에 또 메소드 선택하면 되는거임
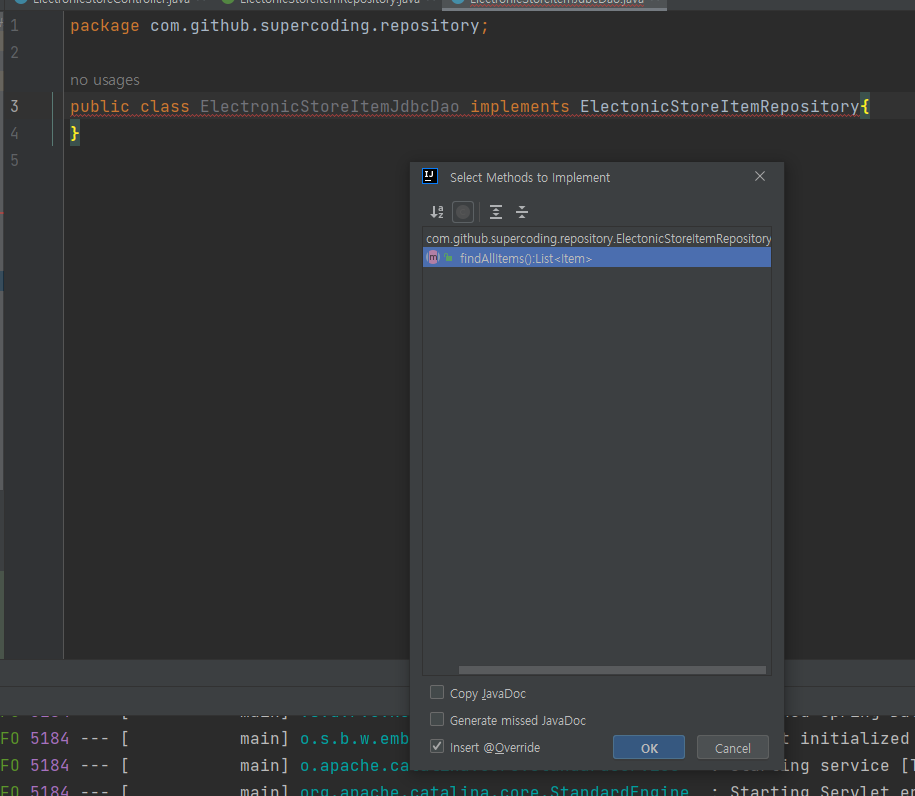
그리고 Bean은 ElectronicStoreItemjdbcDao 이 친구를 빈으로 등록해야한다고함.
Repository는 컴포넌트로 이루어져있어서 옛날에 얘기한적이 있다함 컴포넌트가 빈을 등록하는 방법중에 하나라고함.
그래서 ⭐@Repository 어노테이션⭐ 을 넣어주면 ⭐ ElectronicStoreItemjdbcDao 이 클래스는 하나의 또 빈이 됨⭐
⭐ 그러면 빈이 되서 스프링에 등록을 하는거라고함. ⭐
import com.github.supercoding.web.dto.Item;
import org.springframework.stereotype.Repository;
import java.util.List;
@Repository
public class ElectronicStoreItemJdbcDao implements ElectonicStoreItemRepository{
@Override
public List<Item> findAllItems() {
return null;
}
}
+ ElectronicStoreController가 ⭐실제 di를 받아야하니까 ⭐ 이거는 생성자로 받도록 하게함.
그리고 필드 설정을 electronicStoreRespotory만 클릭해서 생성자만들어줌.
this.electonicStoreItemRepository = electonicStoreItemRepository;
}
이 부분 받아서 이게 빈에 등록이 되고 이 필드 설정이 findAllItems의 return문에 써먹게 되는거라고함. (뭔말이야 맞게이해한 듯)
public List<Item> findAllItem (){
return electonicStoreItemRepository.findAllItems();
}
그리고 이 부분에 실제 db에 접근하는 로직을 적어줘야하는거임 지금 ElectronicStoreItemjdbcDao > findAllItems() 안에
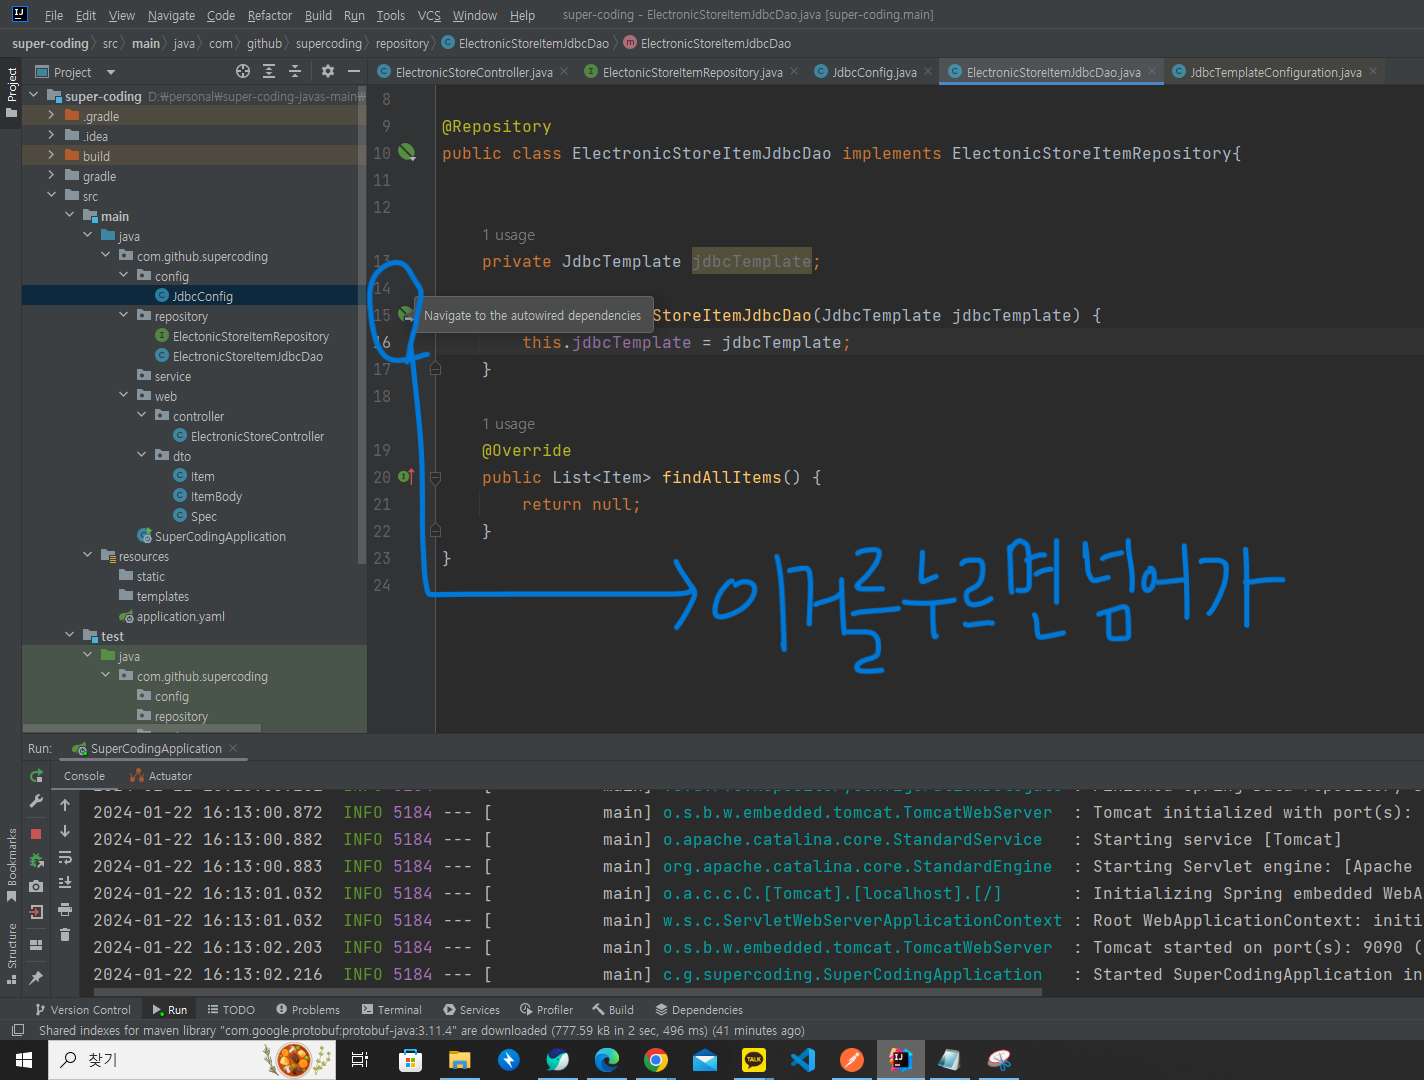
이걸 하려면 아까 등록해줬던
jdbcTemplate 필드 설정해서 부르고 (부른다는 표현씀)
그러면 import org.springframework.jdbc.core.JdbcTemplate; import됨
⭐jdbcTemplate도 빈이라고함.⭐
그래서 또 생성자를 불러줘야함
그래야 실제로 JdbcTemplate에 아까 로직 적어놓은거를 들고올 수 있게 된다고함
ppt에서 설명을 했다는데 RowMapper를 만들어줘야한다고함
RowMapper를 만들어야야지 jdbc를 쉽게 사용할 수 있고 각각의 필드들을 매핑할 수 있게 된다고함.
RowMapper의 item은 이전의 아이템을 실제로 클라이언트에게 가기위한 dto용 아이템이라고함.
⭐말했다는데 dto랑 entity는 같이 쓰지말고 분리를 하자고 ⭐
그래서 새로운 클래스인 ItemEntity라는 클래스를 만들거라고함.
import com.github.supercoding.web.dto.Item;
import org.springframework.jdbc.core.JdbcTemplate;
import org.springframework.jdbc.core.RowMapper;
import org.springframework.stereotype.Repository;
import java.util.List;
@Repository
public class ElectronicStoreItemJdbcDao implements ElectonicStoreItemRepository{
private JdbcTemplate jdbcTemplate;
static RowMapper<ItemEntity> itemEntityRowMapper;
public ElectronicStoreItemJdbcDao(JdbcTemplate jdbcTemplate) {
this.jdbcTemplate = jdbcTemplate;
}
@Override
public List<Item> findAllItems() {
return null;
}
}
그래서 resposiory폴더 하위에 ItemEntity 클래스만들어줌
public class ItemEntity {
}
아 ㅅㅂ 복잡해...
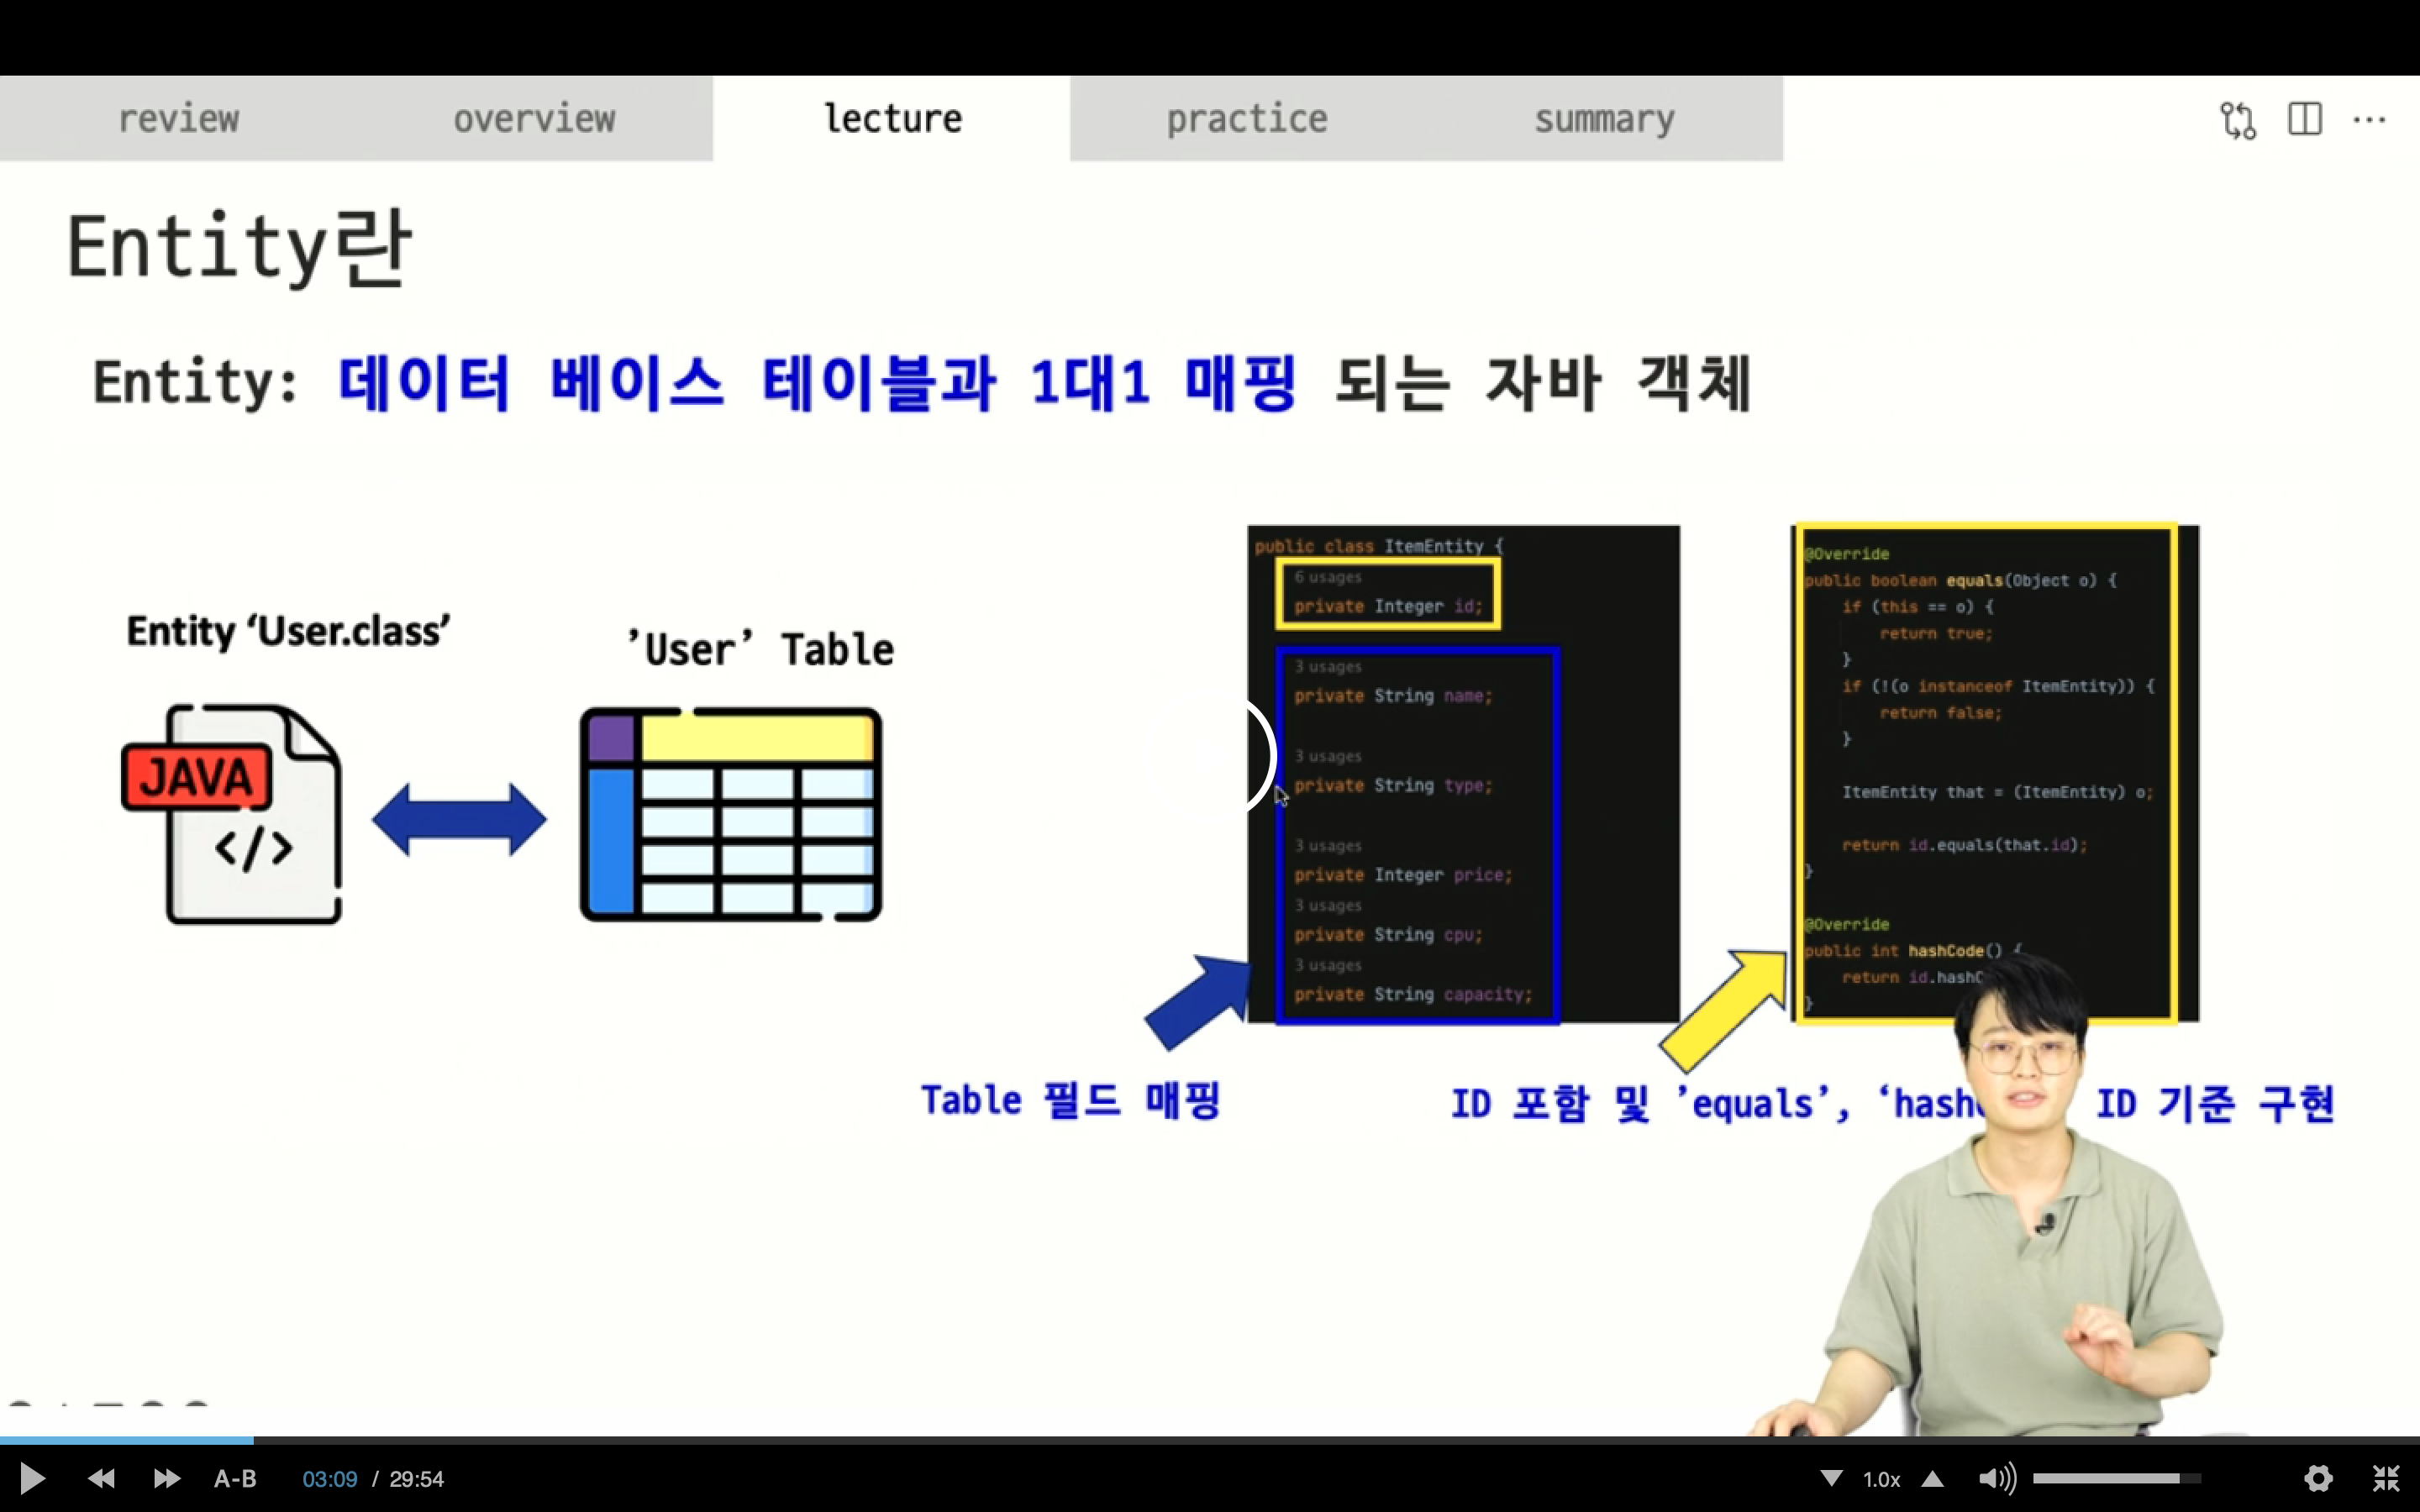
ItemEntity는 데이터베이스에 테이블과 1:1 매핑되는 자바클래스다.
이 아이템 테이블이랑 매핑된다고..
테이블 이름은 좀 달라고 상관없다함.
All constructor, getter, setter, equals, hashcode (같은지 안 같은지 명시하는건데 테이블을 primary key인 아이디를 기준으로함)
⭐이렇게 하면 역할상이나 필드상이나 비슷하게 정의한 Entity를 정의한거라고함. ⭐
import java.util.Objects;
public class ItemEntity {
private Integer id;
private String name;
private String type;
private Integer price;
private String cpu;
private String capacity;
public ItemEntity(Integer id, String name, String type, Integer price, String cpu, String capacity) {
this.id = id;
this.name = name;
this.type = type;
this.price = price;
this.cpu = cpu;
this.capacity = capacity;
}
public Integer getId() {
return id;
}
public String getName() {
return name;
}
public String getType() {
return type;
}
public Integer getPrice() {
return price;
}
public String getCpu() {
return cpu;
}
public String getCapacity() {
return capacity;
}
public void setId(Integer id) {
this.id = id;
}
public void setName(String name) {
this.name = name;
}
public void setType(String type) {
this.type = type;
}
public void setPrice(Integer price) {
this.price = price;
}
public void setCpu(String cpu) {
this.cpu = cpu;
}
public void setCapacity(String capacity) {
this.capacity = capacity;
}
@Override
public boolean equals(Object o) {
if (this == o) return true;
if (o == null || getClass() != o.getClass()) return false;
ItemEntity that = (ItemEntity) o;
return Objects.equals(id, that.id);
}
@Override
public int hashCode() {
return Objects.hash(id);
}
}
⭐RowMapper ctrl 타고 드렁가면 functionalInterface라고함 그래서 functional programming으로 작성을 할 수 있다.
rs: 각각의 필드에 접근하는 느낌이다..
rowNum: 실제로 rowMapper가 sql에 가서 한줄씩 읽는다.
그리고 rowMapper를 통해서 어떤 객체를 만들지를 JDBC Template한테 알려줘야하는데
우리같은 경우에는 ItemEntity라는 객체를 만들거임.
그 안에서 각각 넣어주면 된다고함.
⭐varchar은 NString임. ⭐
import com.github.supercoding.web.dto.Item;
import org.springframework.jdbc.core.JdbcTemplate;
import org.springframework.jdbc.core.RowMapper;
import org.springframework.stereotype.Repository;
import java.util.List;
@Repository
public class ElectronicStoreItemJdbcDao implements ElectonicStoreItemRepository{
private JdbcTemplate jdbcTemplate;
static RowMapper<ItemEntity> itemEntityRowMapper = ((rs, rowNum) -> (
new ItemEntity(
rs.getInt("id"),
rs.getNString("name"),
rs.getNString("type"),
rs.getInt("price"),
rs.getNString("cpu"),
rs.getNString("capacity"))))
public ElectronicStoreItemJdbcDao(JdbcTemplate jdbcTemplate) {
this.jdbcTemplate = jdbcTemplate;
}
@Override
public List<Item> findAllItems() {
return null;
}
}
그 다음에 jdbcTemplate에서 query를 해서 쿼리를 넣어주면 됨.
SELECT * FROM item 허고 콤마 하고 RowMapper를 넣어주면 된다고함.
findAlltem()에서 반환값이 List<Item>인데 그래서
또 stream으로 변환하고 map을 해가지고 collect to List 쓰면 된다고함 (정말 많이 쓴다고함)
map에는 Item의 이걸바꿔주는걸 작성을 한다함 생성자에 새로구현을 한다함...
이 부분을 넣어주는거임.
ItemEntity 를 가지고 이 생성자가 받으면은 해체해가지고 자기만의 생성자를 만드는거임
dto에 추가
this.id = itemEntity.getId().toString();
this.type = itemEntity.getType();
this.price = itemEntity.getPrice();
this.name = itemEntity.getName();
this.spec = new Spec(itemEntity.getCpu(), itemEntity.getCapacity());
}

그리고 map에 고급시간에 배웠던 메소드 레퍼런스를 사용해서 명시할 수 있다함.
이 메소드 레퍼런스 Item::new 이게 뭘 뜻하는거야? 나 아예 개념을 몰라서 쉽게 설명을 좀 해줄래?
Java에서는 생성자 참조의 형태가 ClassName::new입니다. 이 경우 ⭐ Item::new는 Item 클래스의 기본 생성자를 의미 ⭐ 하며, ⭐ 이 생성자는 매개변수를 받지 않습니다 ⭐ . 즉, Item::new는 인스턴스를 생성하는 데 별도의 매개변수를 필요로하지 않는 Item 클래스의 기본 생성자를 가리키게 됩니다.
⭐ map(Item::new)는 ItemEntity를 가져와서 Item으로 변환하는 작업을 수행 ⭐ 하는데, 이때 Item::new를 사용하여 Item 객체를 생성합니다. 그리고 이렇게 생성된 Item 객체들이 스트림의 각 요소에 매핑되어 새로운 리스트로 반환됩니다
import com.github.supercoding.web.dto.Item;
import org.springframework.jdbc.core.JdbcTemplate;
import org.springframework.jdbc.core.RowMapper;
import org.springframework.stereotype.Repository;
import java.util.List;
import java.util.stream.Collectors;
@Repository
public class ElectronicStoreItemJdbcDao implements ElectonicStoreItemRepository{
private JdbcTemplate jdbcTemplate;
static RowMapper<ItemEntity> itemEntityRowMapper = ((rs, rowNum) -> (
new ItemEntity(
rs.getInt("id"),
rs.getNString("name"),
rs.getNString("type"),
rs.getInt("price"),
rs.getNString("cpu"),
rs.getNString("capacity"))))
public ElectronicStoreItemJdbcDao(JdbcTemplate jdbcTemplate) {
this.jdbcTemplate = jdbcTemplate;
}
@Override
public List<Item> findAllItems() {
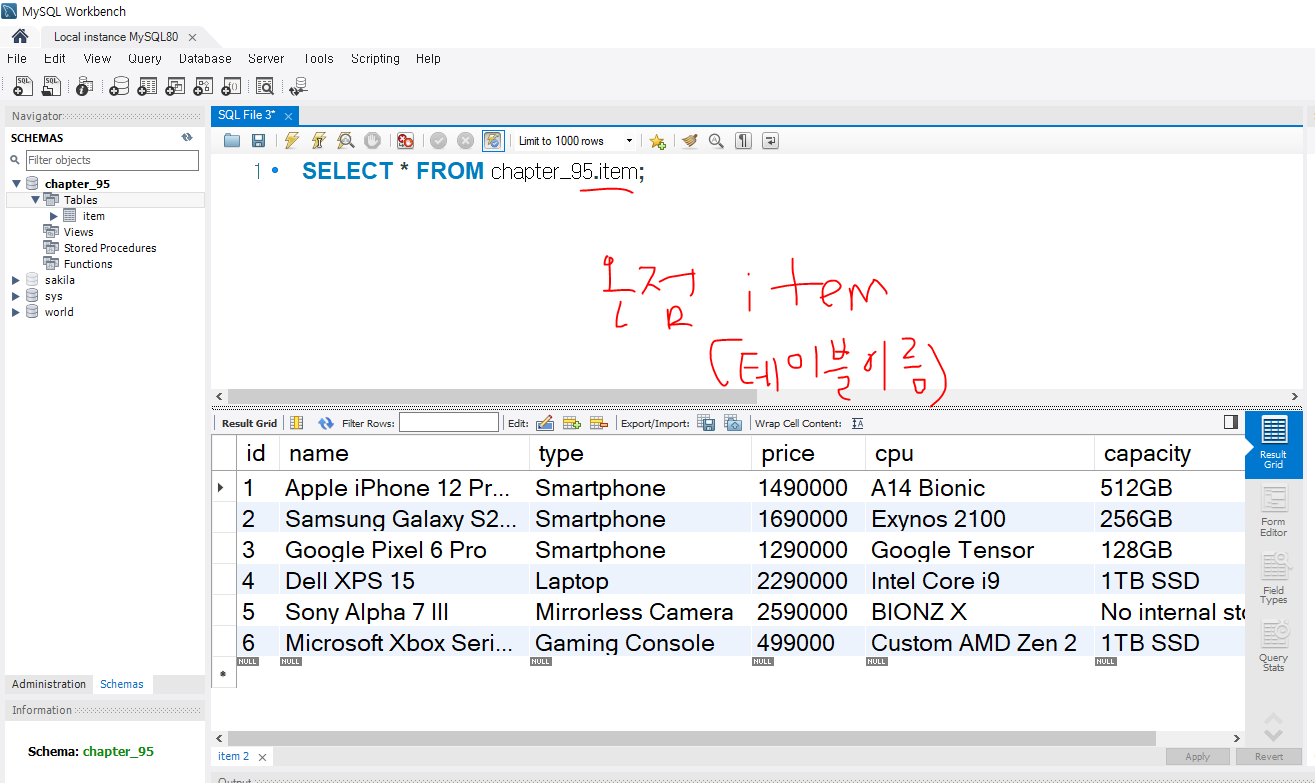
List<ItemEntity> itemEntities = jdbcTemplate.query("SELECT * FROM item", itemEntityRowMapper);
return itemEntities.stream().map(Item::new).collect(Collectors.toList());
}
}
itemEntities.stream()은 List<ItemEntity>를 스트림으로 변환하고, map(Item::new)을 통해 각 ItemEntity를 Item으로 변환하는 작업을 수행합니다.
구체적으로 말하면:
- itemEntities.stream()은 List<ItemEntity>를 스트림으로 변환합니다.
- map(Item::new)는 각각의 ItemEntity에 대해 Item 클래스의 기본 생성자를 호출하여 새로운 Item 객체를 생성합니다.
- 최종적으로 collect(Collectors.toList())는 이렇게 생성된 Item 객체들을 다시 리스트로 모아 반환합니다.
간단히 말하면, itemEntities 리스트의 각 ItemEntity를 Item으로 변환하여 새로운 리스트를 생성하는 것입니다. 이렇게 하면 Item으로 구성된 리스트를 얻을 수 있게 됩니다.
그리고 스트링 실행하고 postman으로 실행하면 됨.

순서 다시 정리하면 ElectornicItemRepository로 가서
findAllitem 호출이면
public List<Item> findAllItem (){
return electonicStoreItemRepository.findAllItems();
}
ElectornicStoreItemJbdcDao에가서
public List<Item> findAllItems() {
List<ItemEntity> itemEntities = jdbcTemplate.query("SELECT * FROM item", itemEntityRowMapper);
return itemEntities.stream().map(Item::new).collect(Collectors.toList());
}
여기에 sql문으로 db에 접근해서 , 콤마 뒤에 있는 RowMapper로
위에 객체로 자동으로 매핑해주고
new ItemEntity(
rs.getInt("id"),
rs.getNString("name"),
rs.getNString("type"),
rs.getInt("price"),
rs.getNString("cpu"),
rs.getNString("capacity"))));
그것들을itemEntities로 리스트로 나오고 그 다음 stream api를 사용해서 Item으로 바꿔서 리턴을 했고
List<ItemEntity> itemEntities = jdbcTemplate.query("SELECT * FROM item", itemEntityRowMapper);
그 받은 값들 다시 리턴을 해서 이 부분
@GetMapping("/items")
public List<Item> findAllItem (){
return electonicStoreItemRepository.findAllItems();
}
클라이언트 사이드로 보내는거임
'PROGRAMMING > 슈퍼코딩 강의 정리' 카테고리의 다른 글
| [슈퍼코딩] 95-1강 스트링 부트 Service Layer 살펴보기 (0) | 2024.01.23 |
|---|---|
| [슈퍼코딩] 94-2강 스트링 부트 Data Access Layer 좀 더 살펴보기 (0) | 2024.01.22 |
| [슈퍼코딩] 85강 (여기에 postman 실습있음) (1) | 2024.01.03 |
| 93강 web layered 살펴보기 + postman 실습 very impo (0) | 2024.01.02 |
| 92강 스프링 부트 코드 구조 둘러보기 (93강 하기위한 프로젝트 셋팅 부분있음) (0) | 2024.01.02 |


