
- 분류 전체보기 (701)

- PROGRAMMING (434)
- JAVA (11)
- JAVA SPRING (13)
- PYTHON (0)
- JAVASCRIPT (21)
- React (70)
- HTML (0)
- Next.JS (1)
- CSS (2)
- DB (Oracle, MongoDB, etc.) (1)
- 깃허브 (31)
- 백엔드 (2)
- 프로젝트 (24)
- 슈퍼코딩 강의 정리 (125)
- ERROR (5)
- 단축키 기타 (1)
- 리눅스 (2)
- LEETCODE (1)
- 정보처리기사 (1)
- 프로그래밍 영어 (2)
- 코테 (5)
- 면접준비 (33)
- 웹사이트 아이디어 비공개 (1)
- 정보처리기사(기본 CS 정보정리) (0)
- 백준 (1)
- 기타 (56)
- 도서 내용 정리 (22)
- 삽질로그 (2)
- PREPLY (1)
- TRAVEL (0)
- DIARY (4)
- OVERSEAS SALES (143)
- PERSONAL (1)
- PROGRAMMING (434)
| 일 | 월 | 화 | 수 | 목 | 금 | 토 |
|---|---|---|---|---|---|---|
| 1 | 2 | 3 | 4 | 5 | ||
| 6 | 7 | 8 | 9 | 10 | 11 | 12 |
| 13 | 14 | 15 | 16 | 17 | 18 | 19 |
| 20 | 21 | 22 | 23 | 24 | 25 | 26 |
| 27 | 28 | 29 | 30 |
- 암홀트롭
- 비슬론지퍼
- 클린코드
- 엑셀자동서식
- 헤이큐
- 우레탄지퍼
- 지연환가료
- 웹API
- 핸드캐리쿠리어차이점
- 요척합의
- 봉제용어
- 필터링후복사붙여넣기
- 와끼
- WHATTIMEOFTHEDAY
- 미니마카
- 고급영어단어
- 40HQ컨테이너40GP컨테이너차이
- 영어시간읽기
- 나일론지퍼
- 엑셀필터복사붙여넣기
- MERN스택
- 엑셀드래그단축키
- Armhole Drop
- 슈퍼코딩
- 비리짐
- TACKING
- AATCC
- 미국영어연음
- 자켓실측
- 40HQ컨테이너
- Today
- Total
CASSIE'S BLOG
Clothing Measurement (실측) 재는 법 본문
매저 매져 하는 법 헷갈리면
참고 출처:
http://garmentstech.com/how-to-measuring-garment-tops/
How to measuring garment tops. « Garments Tech
Term Abbreviation CB = Center Back CF = Center Front HPS = High Point Shoulder W/O = Without W/B = waistband Preparation -Measurement surface must be smooth and flat. -Garment must be buttoned or [...]
garmentstech.com
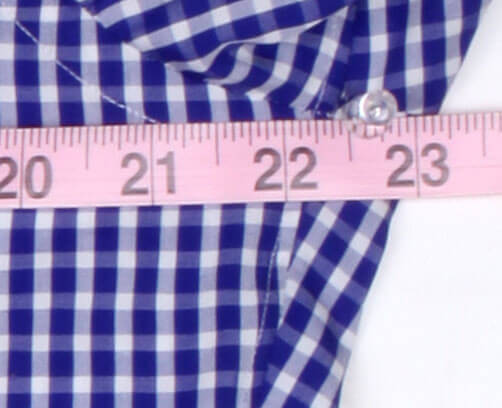
1. Chest
Button up the shirt and lay it flat on the ground (preferably a hard surface) and smooth the fabric out so that there are no wrinkles underneath or on top. Pull the fabric tight, but don’t stretch it. Place the measuring tape at the top of the seam where the sleeve attaches to the body of the shirt and measure across to the same point on the other side of the shirt. Don’t worry if you measure beyond the side seam on the shirt, just measure the shirt flat across. The correct measurement in the example photos is 23".

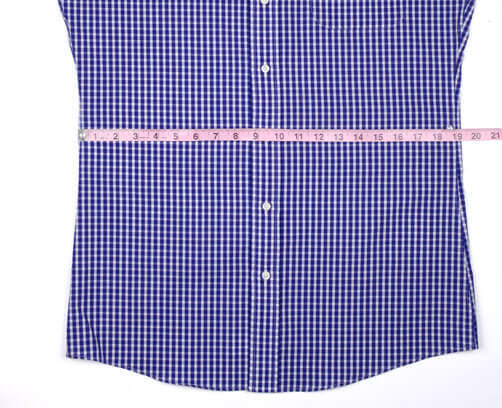
2. Waist
Lay the shirt flat on a hard surface (same as above). Find the narrowest part of the shirt, which should be about halfway between the armpit and the bottom of the shirt (or around the 5th or 6th buttons). Measure straight across from the left of the shirt to the right of the shirt. The correct measurement in the example photos is 19.25".
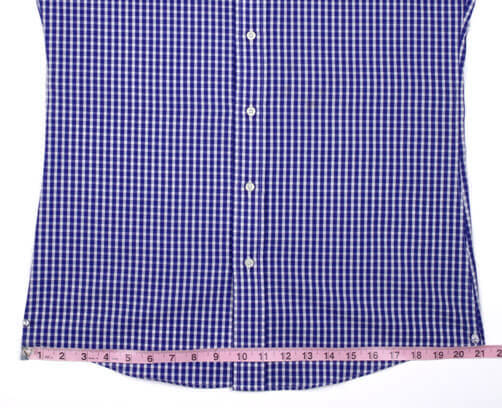
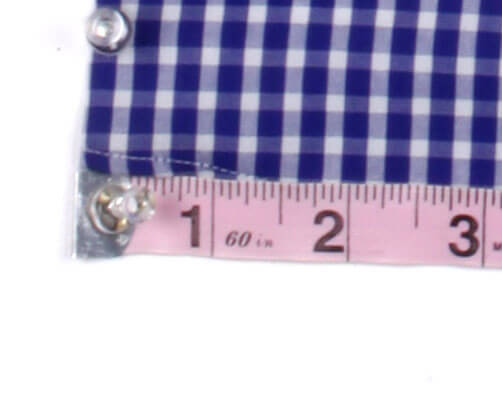
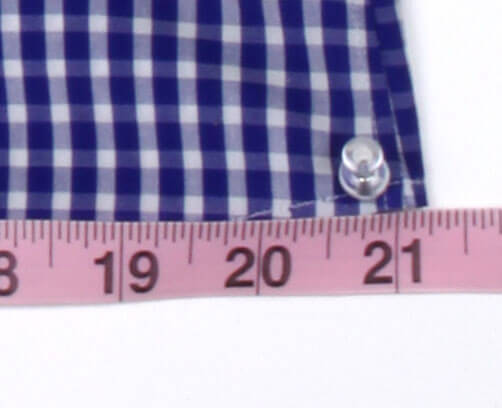
3. Seat
Lay the shirt flat on a hard surface (same as above). Place the measuring tape on the left bottom hem and measure straight across to the same point on the right side of the shirt. The correct measurement in the example photos is 21.25".
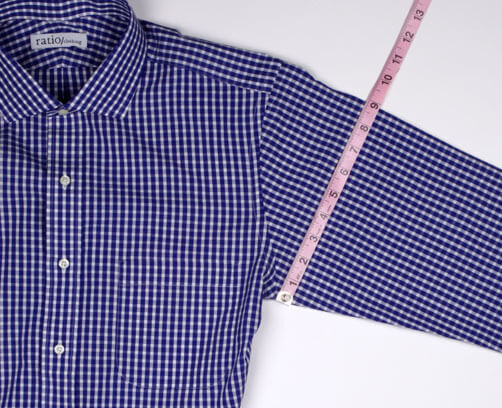
4. Bicep
With the shirt buttoned and laid flat on the back, spread the shirt sleeve out to the side and smooth out the fabric, so that the bottom seam of the sleeve is where the sleeve is folded. Starting at the bottom of the sleeve, one inch below where the sleeve attaches to the body of the shirt, measure to the top folded edge of the sleeve while keeping the measuring tape perpendicular to the top folded edge of the sleeve. Please note the example photo shows an outdated measurement location and the measuring tape should be shifted one inch below the armhole.
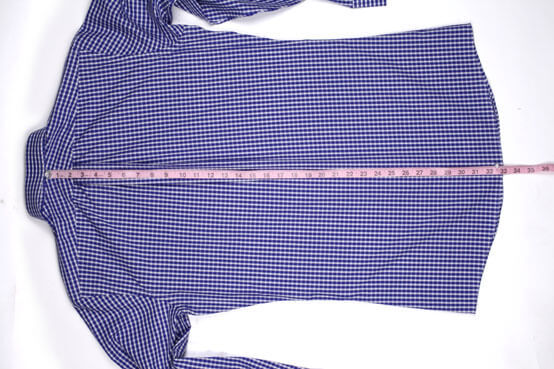
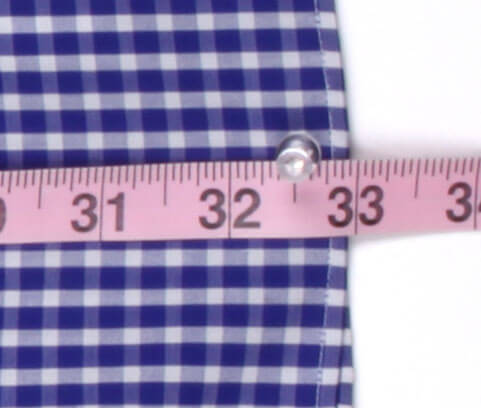
5. Shirt Length
Button up the shirt and lay it flat on the ground with the back of the shirt facing up. Place the measuring tape at the seam where the collar band attaches to the yoke (the fabric that sits across the shoulders) and measure straight down the middle of the back of the shirt to the hem at its longest point. The correct measurement in the example photos is 33".
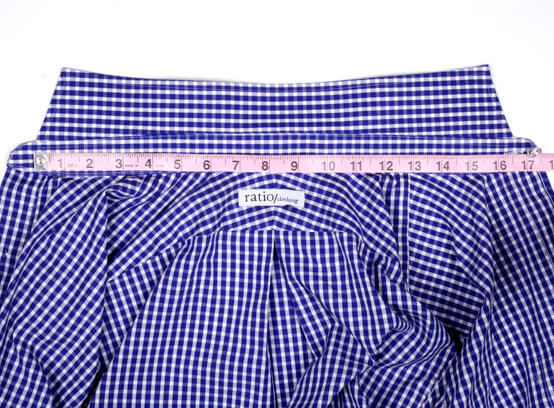
6. Shoulder Width
With the shirt laid flat, back facing up, place the tape at the point on the bottom seam of the yoke where the yoke attaches to the sleeve. Measure straight across to the same point on the other side of the shirt (start and finish on the outside edge of the sames). Like other measurements, smooth out the fabric and pull it tight without stretching it. The correct measurement in the example photos is 18.25".
요크의 바텀심에서 Shoulder Width 잴 것

7. Sleeve Length
Lay the shirt flat with the back facing up. Extend the right sleeve out to the side and smooth it out as much as possible. Start the tape measure at the middle of the yoke, just below the collar band and measure out to the seam where the yoke attaches to the sleeve. Place a finger on the measuring tape at the seam where the yoke attaches to the sleeve to keep it in place, and then pull the tape measure taut to the end edge of the cuff on the sleeve. Record the measurement to the nearest 1/4". The correct measurement in the example photos is 36".
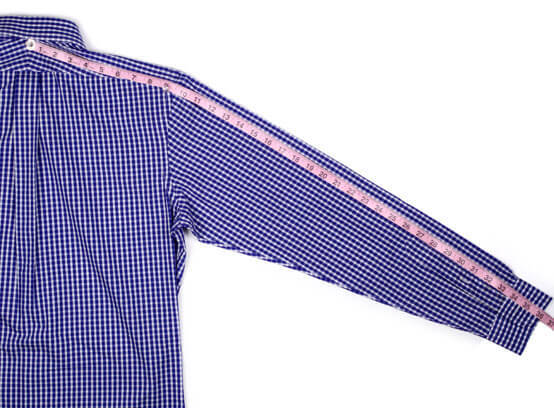
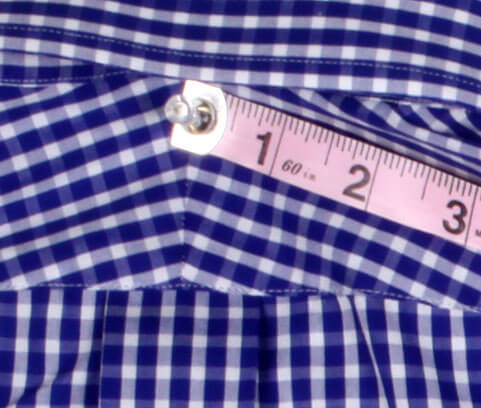
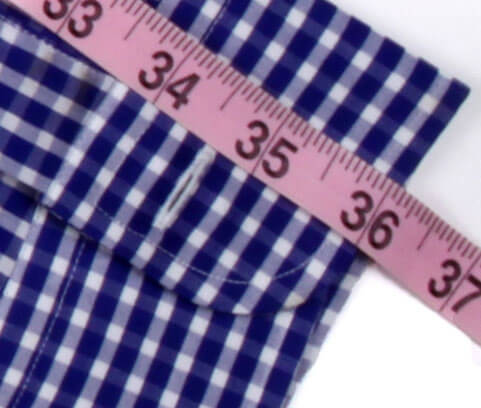
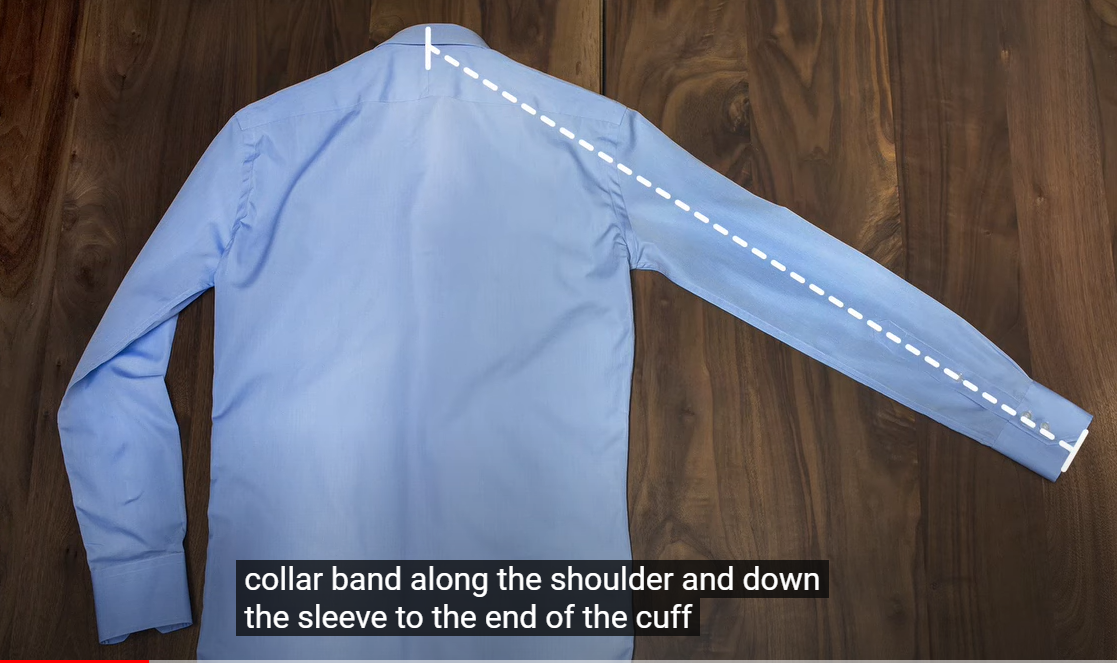
The sleeve length on the dress shirt is measured from the center back of the collar band along the shoulder and down to the sleeve to the end of the cuff.
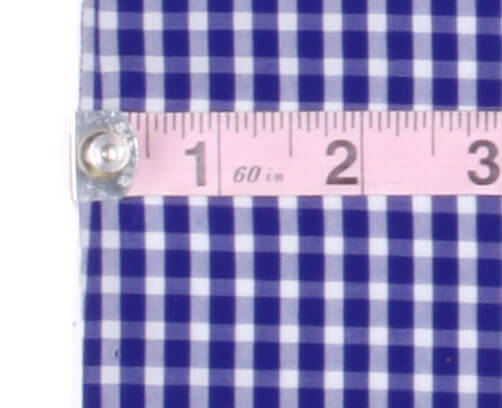
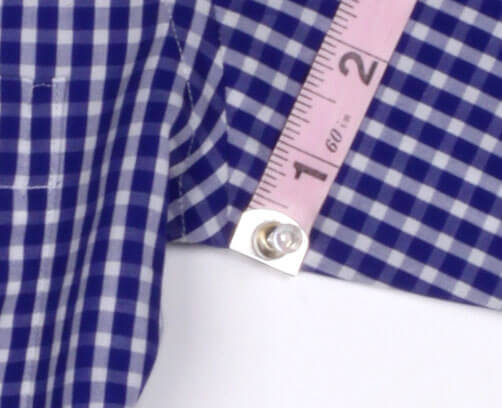
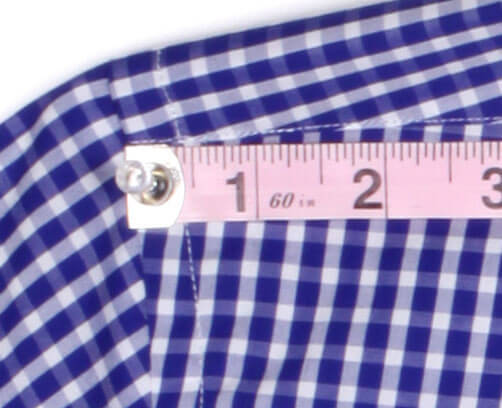
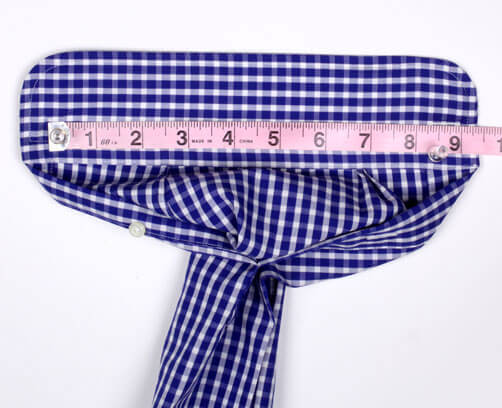
8. Cuff Circumference
Spread the cuff flat with the inside facing up. Measure from the center of the button (you’ll see the stitching) to the outside edge of the buttonhole. In general, you need to pull the cuff pretty tight here compared to the other measurements to get the right measurement since the cuff wants to curve on you naturally. Record the measurement to the nearest 1/4". The correct measurement in the example photos is 9".
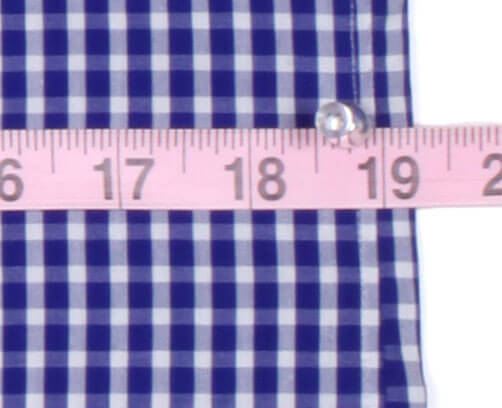
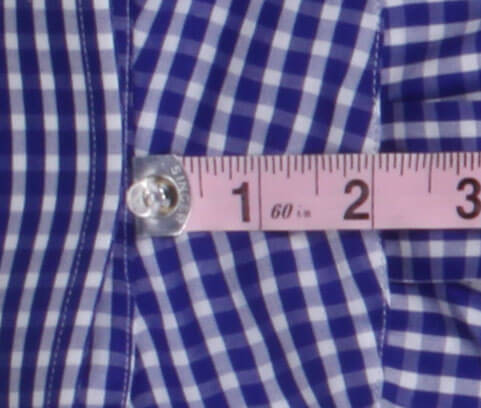
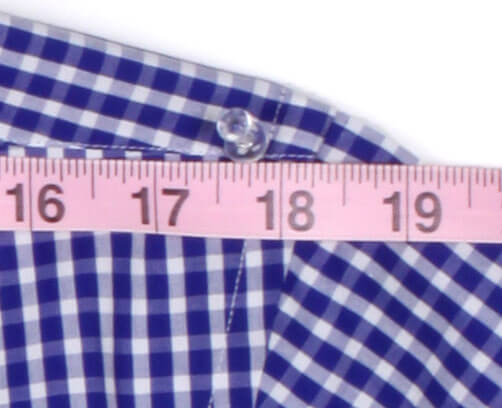
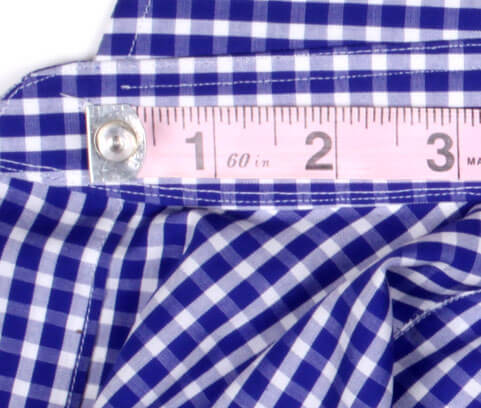
9. Collar Size (※가로로 잽니다.)
Open up the shirt and lay it flat with the back of the shirt on the ground. Open the collar and spread it as flat as possible, pulling tight so that you straighten out any curve. Measure from the center of the button (you should see the stitching) to the middle of the opposite buttonhole. Record the measurement to the nearest 1/4". The correct measurement in the example photos is 16.5".
First Things First
Before we start make sure you lie the jacket flat to avoid any wrinkles that could lead to incorrect measurements
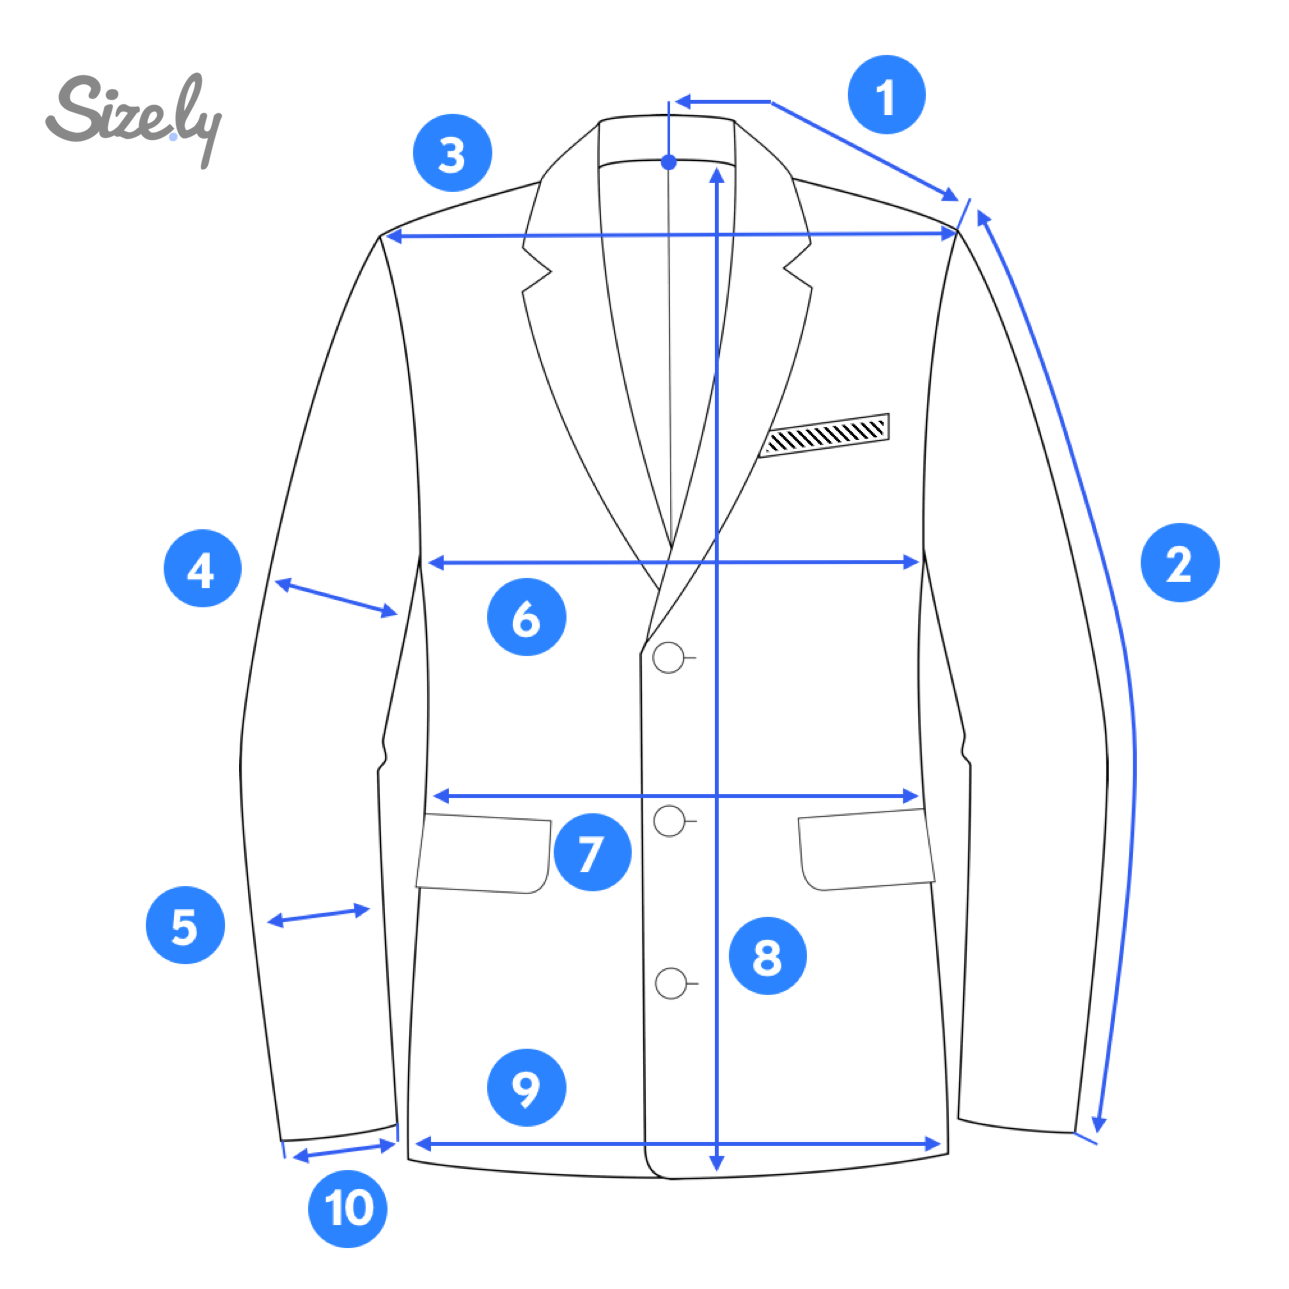
Blazer Jacket
Steps:
- Collar to shoulder: Place the measuring tape at the middle of the collar and pull down to the tip of the shoulder
- Shoulder to sleeve: Measure from the tip of the shoulder down to the bottom of the sleeve
- Shoulder to shoulder: Place the measuring tape at the corner of one shoulder and pull across to the other shoulder. This is an important measurement as some people typically wear the same size but have different shoulder widths.
- Upper arm width: Place the measuring tape in the middle of the upper arm and measure from one side of the sleeve to the other.This measurement is important when it comes to bicep size.
- Forearm width: Place the measuring tape in the middle of the forearm and measure from one side of the sleeve across to the other.
- Chest width: Measure from the bottom of one armhole across the chest to the bottom of the opposite armhole.
- Waist width: Place the measuring tape where the natural waist would fall, usually a bit lower than halfway down the blazer, and measure from one side of the jacket across to the other.
- Front length: Place the measuring tape in the middle of the collar and pull it down vertically to the bottom of the jacket.
- Hip width: Measure from one of the bottom corners of the jacket across to the other.
- Sleeve hole width: Measure the width of the sleeve by placing the measuring tape at one corner of the sleeve hold and pulling it across to the other side.
- All done!
출처: https://www.size.ly/blog/how-to-measure-a-jacket
How to Measure a Jacket? | Size.ly Blog
A blazer jacket is one of those items that has to fit perfectly. You can get away with wearing a loose-fitting blouse or cardigan because the oversized look is quite trendy, but when it comes to blazer jackets...
www.size.ly
How to measure pants?
Before we start with the measuring, lay down the pants on a flat hard surface and smooth out any wrinkles. Once that is done, follow the below steps:
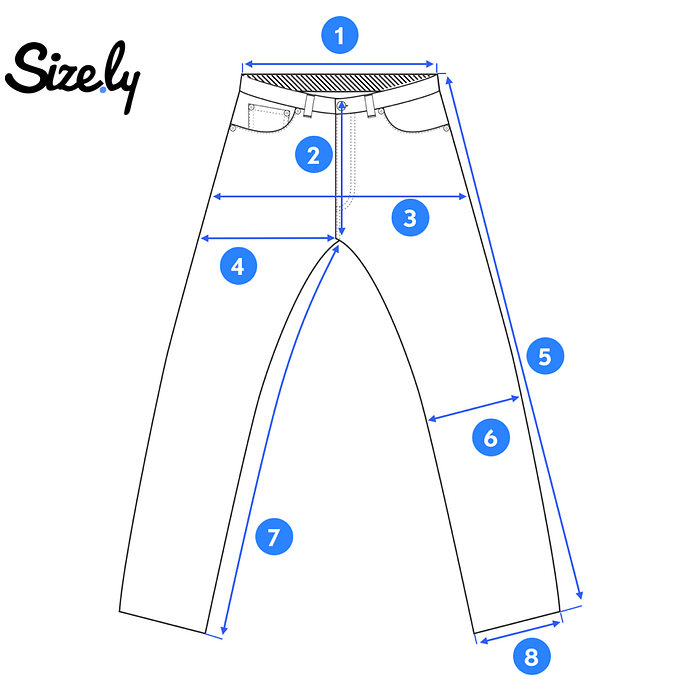
Pants measurement example with areas
1. WAIST: For measuring the waist first button the pants up. Next spread the pants flat on the surface, and remove any fullness and wrinkles from it.
2. FRONT RISE: With the pants buttoned up, spread the pants on the floor or table; next remove all wrinkles, and measure this region by starting from crotch seam spot to the spot of the waistband.
3. HIP: Measure across the hip area, this is in most cases 1 1/2 inches below the zipper.
4. THIGH: Starting at the crotch seam and ending 1–2 inches below the hip area.
5. LENGTH: With the pants buttoned up, spread the pants on a table, floor or any other flat surface, with outseams on both corners. After removing all wrinkles and any fullness, measure the length from the top of the waistband.
6. KNEE: Next remove any wrinkles and fullness if present. Measure across the knee area.
7. INSEAM: Having the pants buttoned up, spread the pants on a surface flat. Now measure the inseam gap from the crotch, at the spot where the front and back seams meet, exactly where, depends on the length you desire ultimately.
8. LEG OPENING: Now in the last step follow the same pattern as the previous steps, which is spread the pants on a flat surface e.g. table or floor. After removing any fullness or wrinkles, start measurement beginning from one side of the leg opening to the other side of the leg opening.
출처: https://medium.com/@SizelyApp/how-to-measure-pants-f799a379cc6f
How to Measure Pants?
Before we start with the measuring, lay down the pants on a flat hard surface and smooth out any wrinkles. Once that is done, follow the…
medium.com
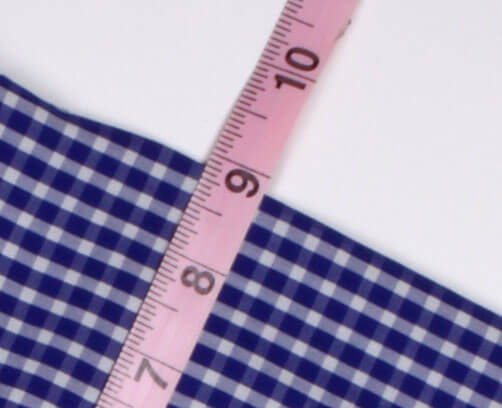
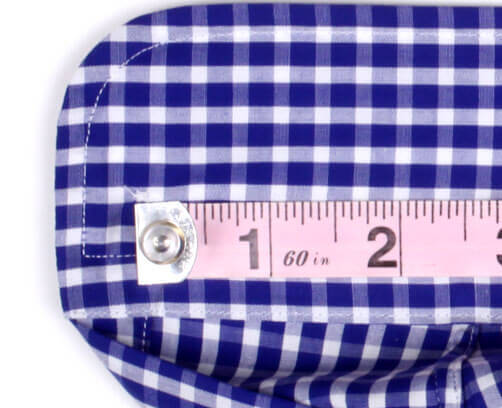
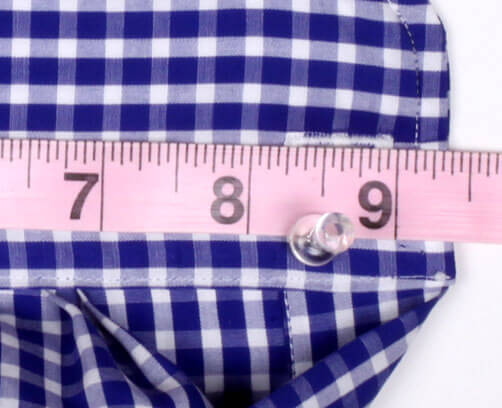
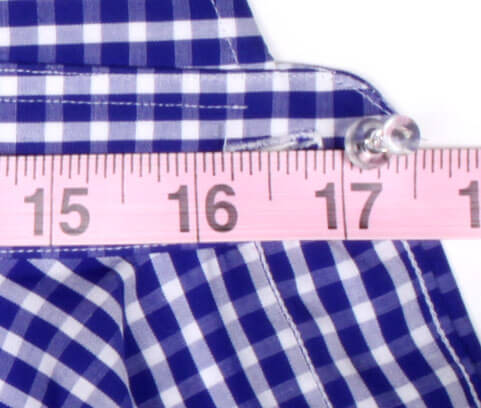
AH DROP (암홀깊이) Armhole Drop 이라고 잘 안하고 AH DROP 이라함

Armhole drop is the placement of where your arm hole is in relationship to the high point shoulder.
I'm going to use this ruler (플라스틱자) to figure out where my curse is and just have it go straight out.
And then I will take my measuring tape (줄자) and mesure from the high point shoulder straight down.
So this particular arm hole drop looks like it's eight inches and three eighths.
'OVERSEAS SALES > 업무 정리' 카테고리의 다른 글
| 면세, 영세, 일반 (0) | 2024.07.22 |
|---|---|
| 그림판 단축키 (0) | 2023.07.14 |